Request Details Page
On request details page, you can see the complete details of the request and do the desired activity. This page is accessible from request list page (by clicking on the request subject).
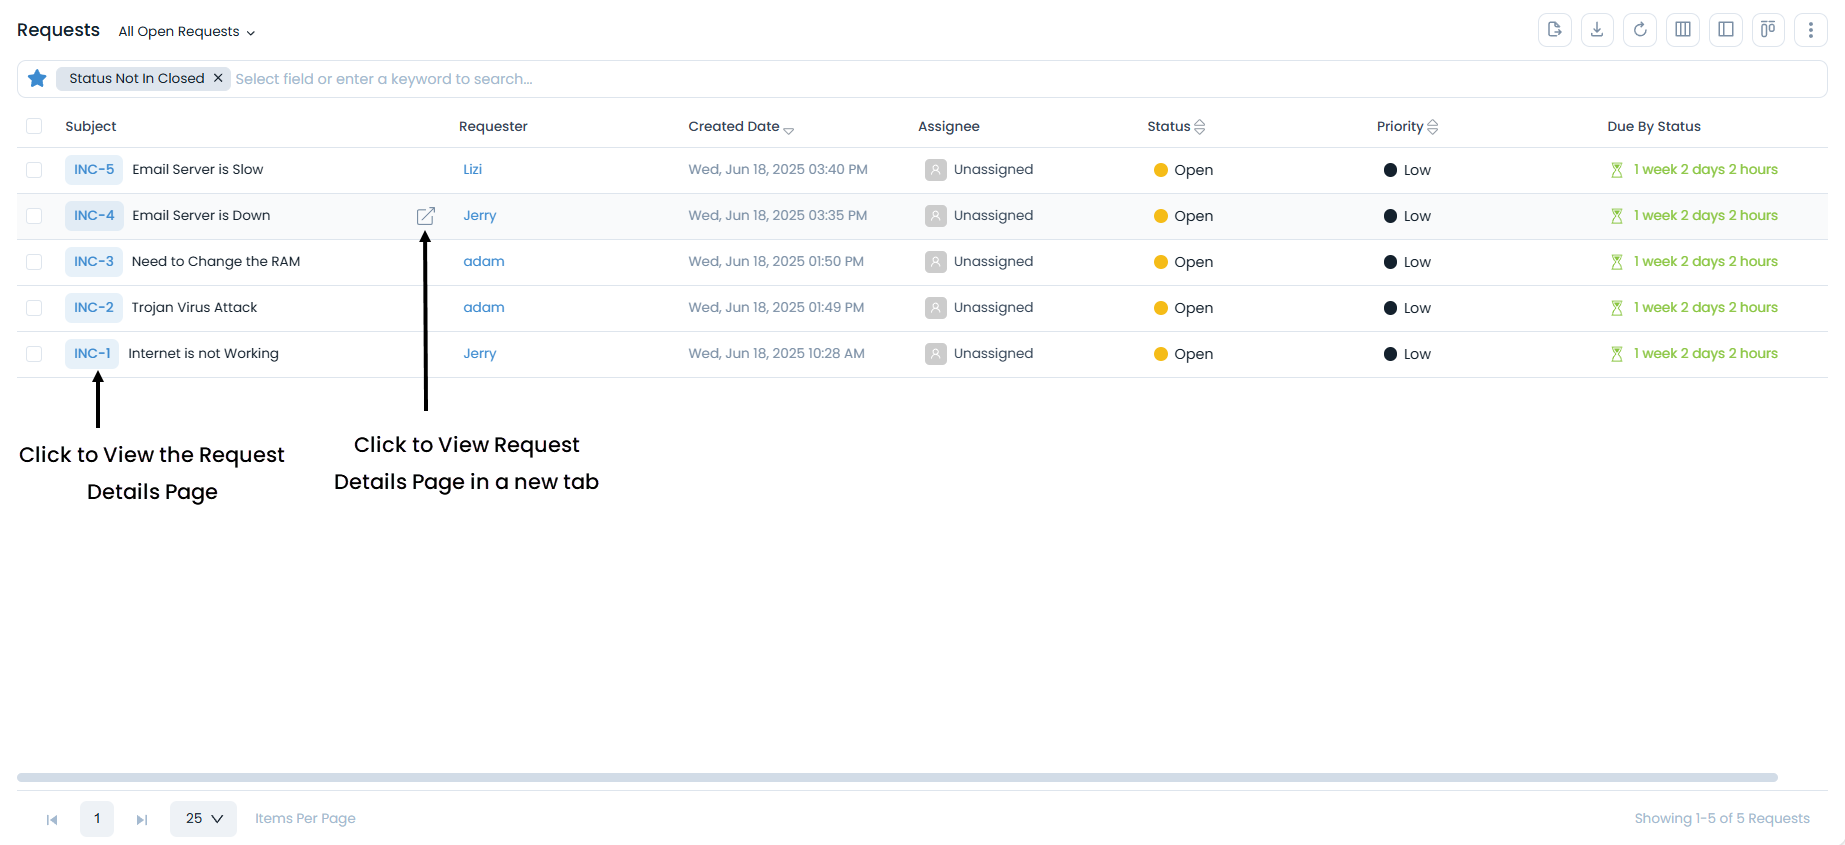
A request details page looks like below. Also, you can watch the video Request Details Page for in-depth details.
It consists of the below sections:
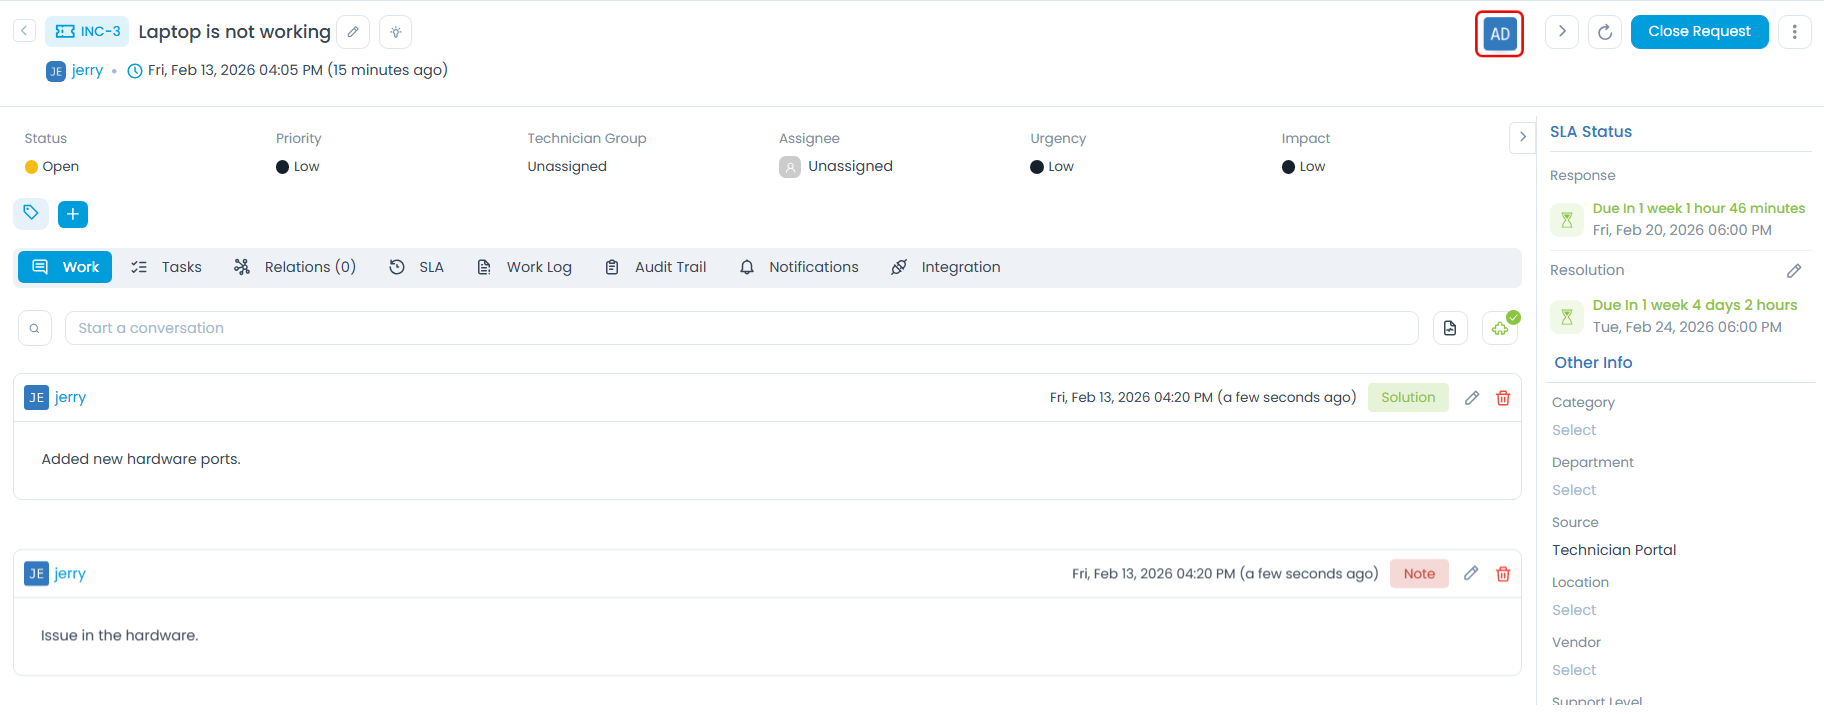
Details
Edit Request
To edit the Request, click the Edit icon next to the Subject, and the below popup appears.

In case of a Service Request, if a "Service Request Form Rule" exists, you can view the Incident and Service Request fields individually as shown below.
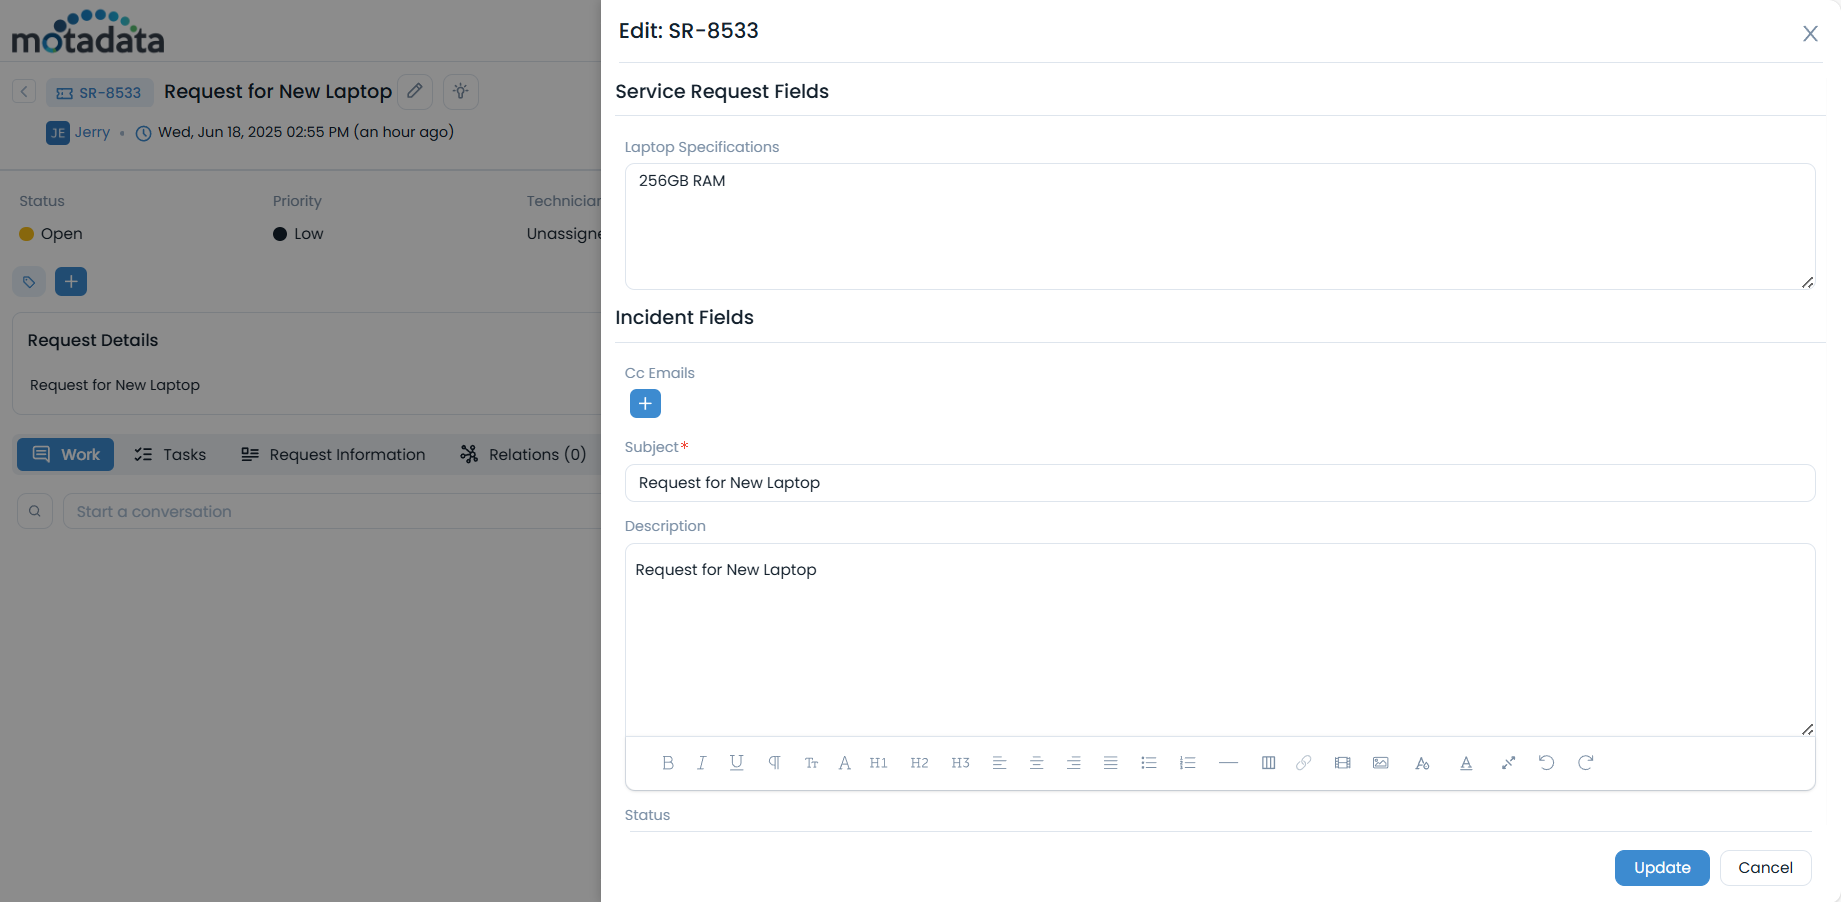
Make the required changes and click Update.
View Suggested Knowledge
To view the suggested knowledge, click the View Knowledge icon next to the edit icon, and the below popup appears.
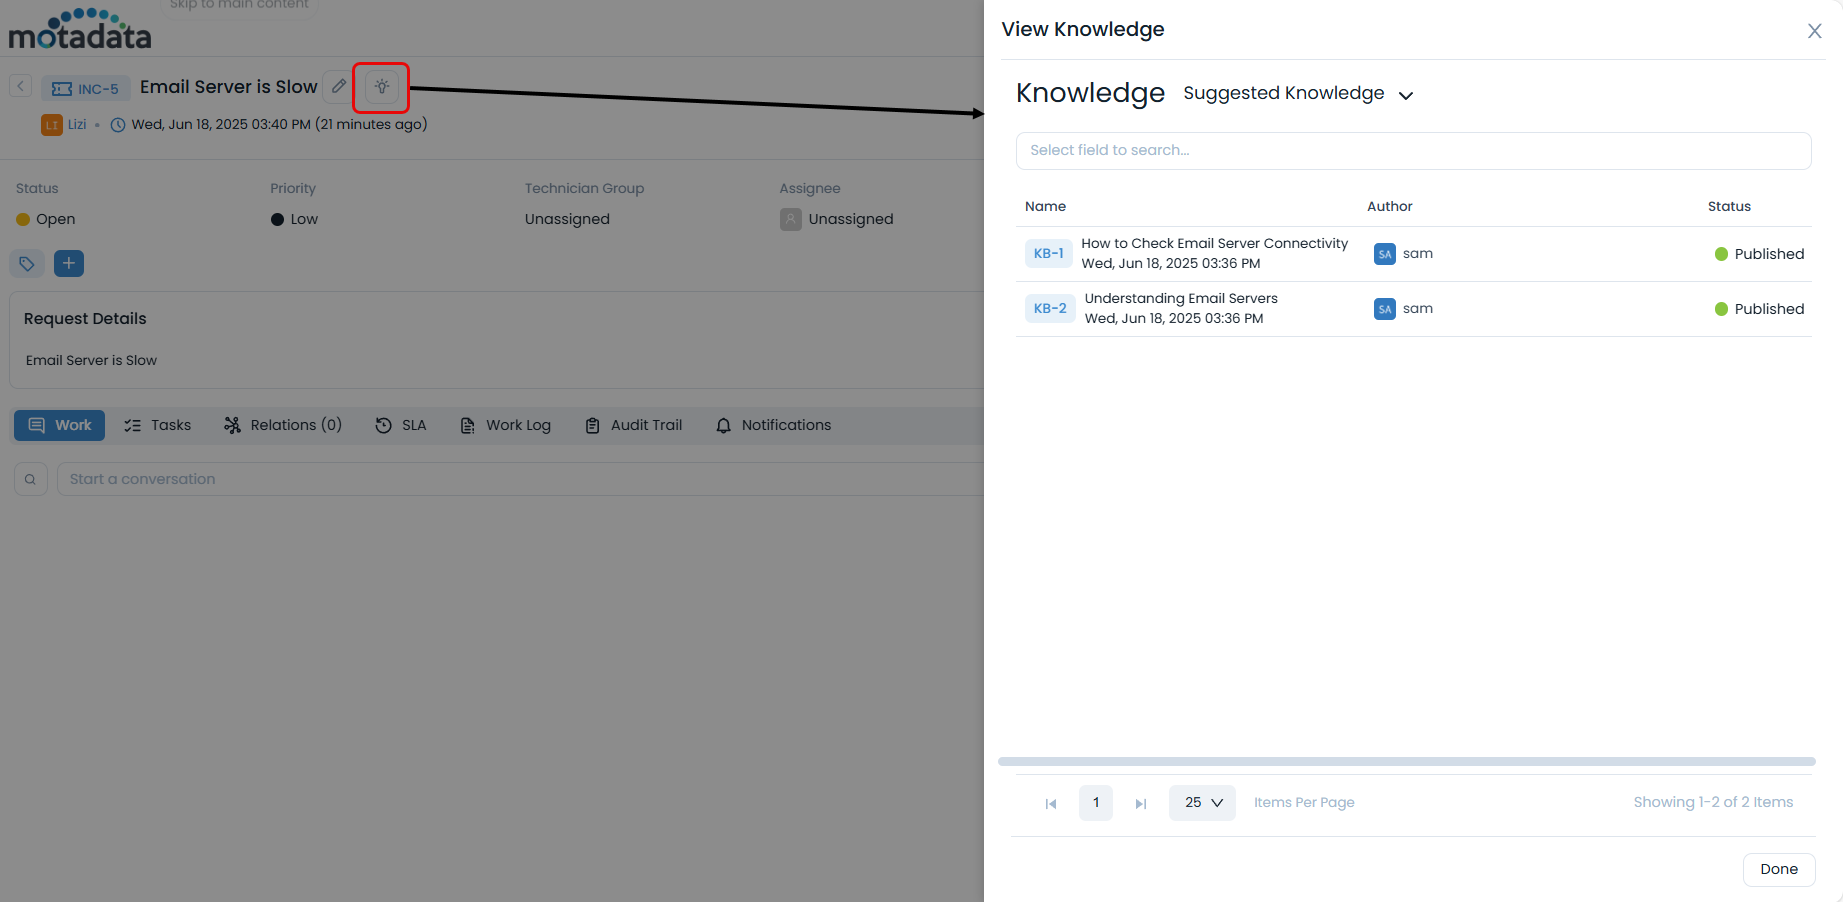
Here, you can view the related knowledge and get the solution.
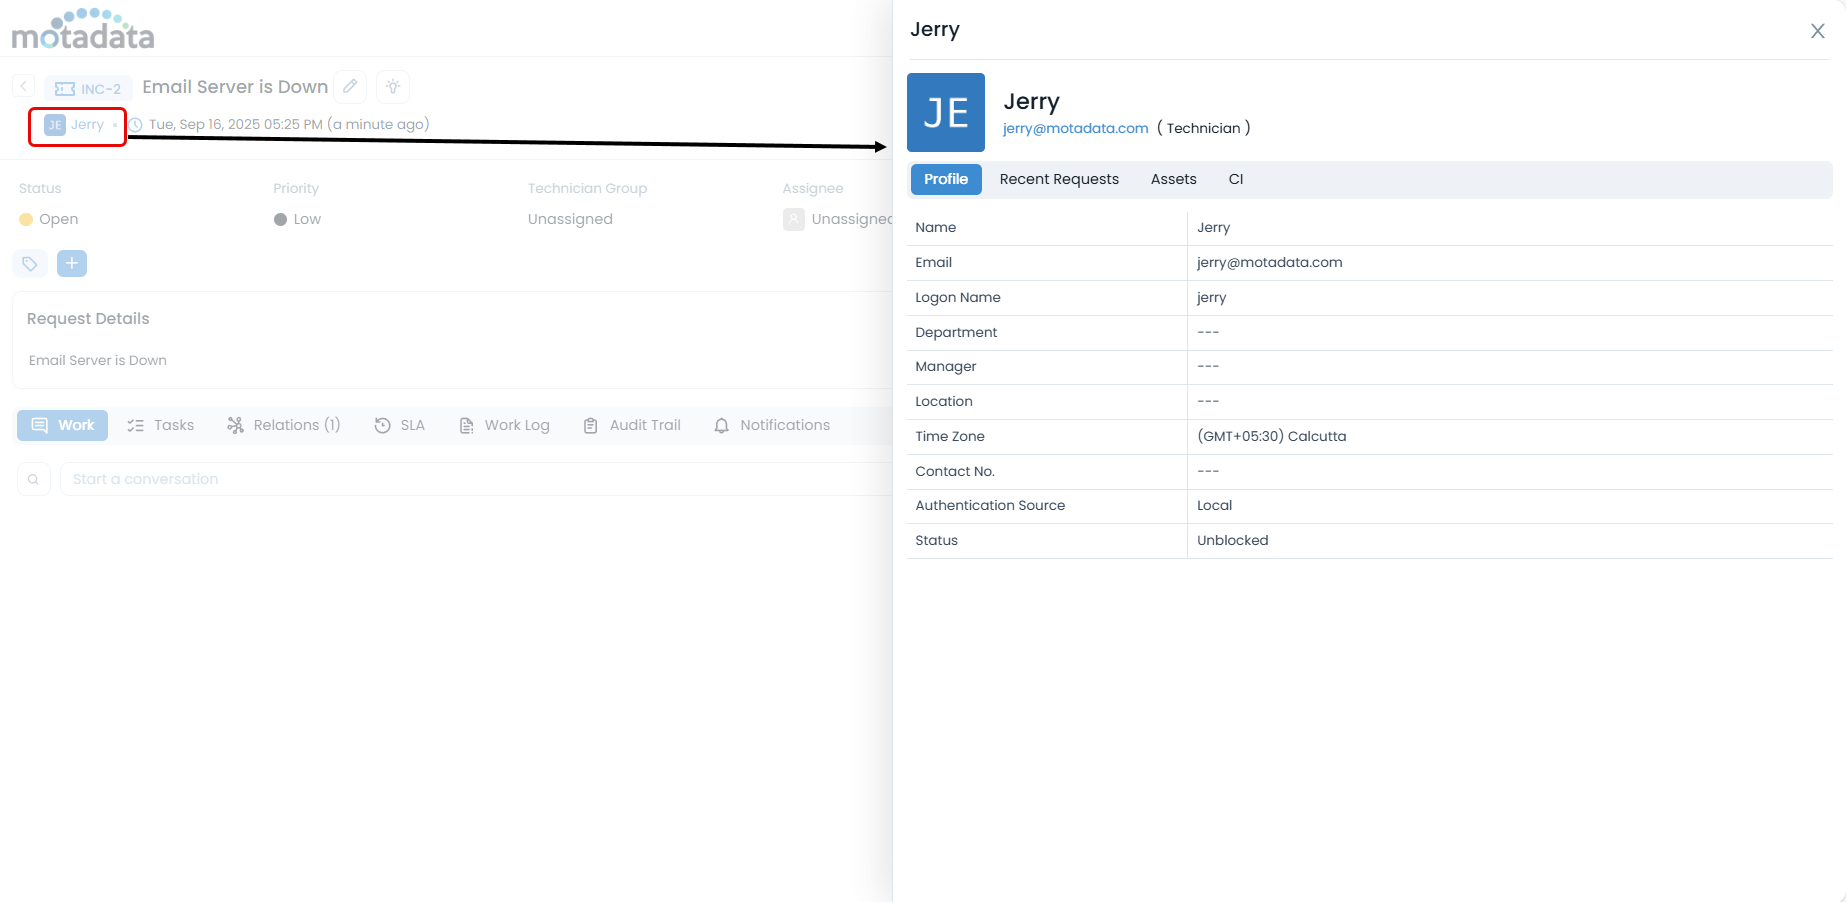
View User Details
You can view the details of a user by clicking on their name. The user's name is available at the following places:
- Next to the Request ID.
- In the Created By and Last Updated By fields under the Other Information section.
When you click on the name, a popup appears with the following details:
- Profile: Basic details of the user like email, department, location, etc.
- Recent Requests: A list of recent requests (Incident and Service Request) raised by the user.
- Assets: A list of assets assigned to the user.
- CI: A list of CIs associated with the user.
Classifiers of Request
These properties tell you the current statistics of the request and help you classify them under different labels. When someone works on a request, they update the labels accordingly. For e.g. if the 'status' is closed, it means you don't need to do anything on the request.

| Properties | Description |
|---|---|
| Status | This label classifies the request based on the status. The value in this label shows the current status of the request. The default options are: Open, In Progress, Pending, Resolved, and Closed. |
| Priority | The label classifies the request based on the priority. The value in this label shows the current priority of the request. The default values are: Low, Medium, High and Urgent. |
| Urgency | The label classifies the request based on the urgency. The value in this label shows the current urgency of the request. The default values are: Low, Medium, High and Urgent. |
| Impact | The label classifies the request based on the impact factor. The value in this label shows the current impact of the request. The default values are: Low, On Users, On Department and On Business. |
| Technician Group | The label helps you sorting the technician when there is a long list. Based on the value selected here, the values of Assignee dropdown changes. |
| Assignee | The label classifies the request based on the person to whom this request is assigned. When the value is 'unassigned', it means that request is not assigned to anyone. The values of assignee depends on the Technician Group value. You can also know the load of the assignee based on the load indicator. You can also filter the technician/requester list to search for the required technician/requester in the dropdown. |

| Properties | Description |
|---|---|
| Due by | Shows the time frame by which you should do all the work related to the request. This is configurable. You can restrict it by disabling the "Update Due By" permission either from the SLA Setting or from User Role permission. Notes: - If SLA is applied, to edit both the permissions should be enabled. If either of them is disabled, the edit icon will not be available. - If SLA is not applied, the edit icon will be available based on the Update Due By role permission. |
| OLA Due In | Shows the time frame by which you should do all the operations related to the request. |
| Add Tags | You can add the custom tags to quickly find the requests based on it. Also, system adds some default tags when based on certain labels and actions. |
Associated Actions for Request
You can create or update different actions and activities as a part of communication, collaboration, and resolution in the request. To add a reply, forward, collaborate, or Note, click the Start Conversation field and the options will appear.
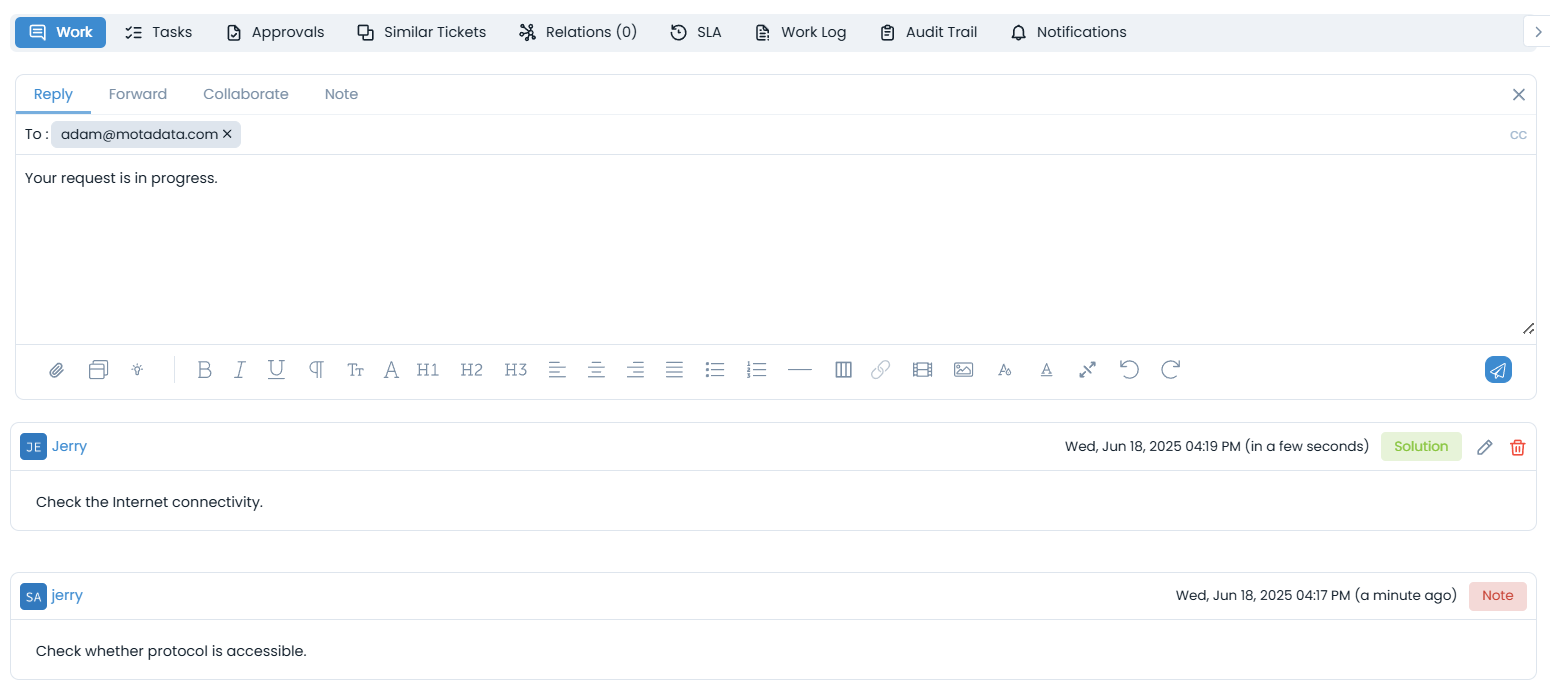
The available types of actions are:
| Action Types | Description |
|---|---|
| Work | You can gather information through collaboration and communication and use it to resolve a Request. |
| Tasks | You can add and manage different tasks related to the request. |
| Similar Tickets | You can view similar requests, problems, and change requests. |
| Approvals | You can see the approvals given for the request, remind the concerned technician about it, and also re-request for approval in case of any request being referred back. |
| Relations | You can relate the request with other requests, problem, change, knowledge or see the merged requests. |
| SLA | You can view the SLAs, OLAs and UCs running on a request along with its details like Name, type, Target, Status, etc. |
| Work Log | You can add and manage the work log about the time and actions spent on the request. |
| Audit Trail | You can see the activity in the journal of all the actions related to the request. |
| Notifications | You can send notifications related to the request. |
| Integration | You can integrate JIRA with ServiceOps to create tickets from the ServiceOps portal. This tab is available only if App Integration is configured. |
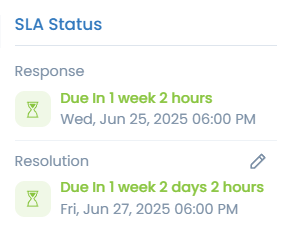
SLA Status
You can view the SLA status details from this section.
Other Information
The other information shows additional details about the request. You can also change them if required.
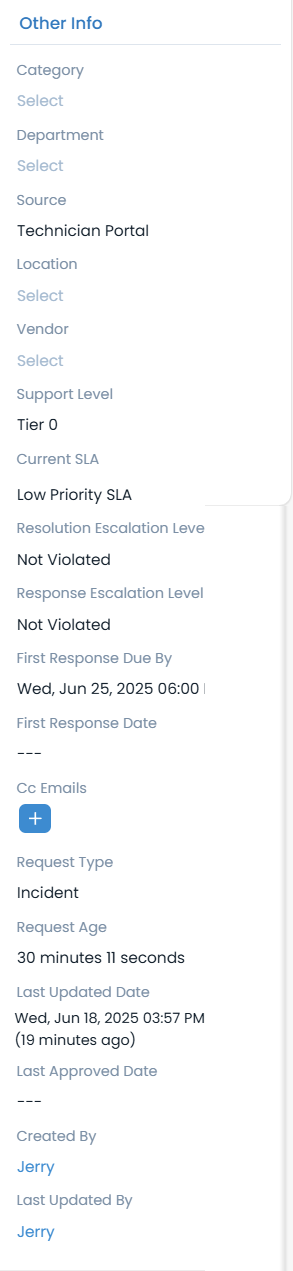
- Category: Shows the category of the request. Default values are: Software, Hardware, Network, HR or Other. If any sub-category is added in the default values, all the values would appear on selection.
- Department: Name of the department to which the request belongs.
- Company: Shows the company to which the request belongs. This field is available only if the Managed Services Provider feature is enabled.
- Source: Shows the information from where the request originated. Default values are: Email, support portal, technician portal, phone, chat, Excel Import, CSV Import, external and others.
- Location: Shows the location from where the request is generated.
- Vendor: Shows the vendor name.
- Support Level: Shows the level of support currently assigned to the request. Default values are: Tier 1, Tier 2, Tier 3, and Tier 4.
- Current SLA: Shows the assigned SLA.
- Transition Model: Shows the transition model applied to the request.
- Resolution Escalation Level: Shows the resolution escalation level of the request.
- Response Escalation Level: Shows the response escalation level of the request.
- First Response Due By: Shows the date and time till which the first response is due. Once a response is received within the defined SLA response time, this field will become disabled. This means the value will remain unchanged, even if the SLA is paused or another SLA is applied.
- First Response Date: Shows the date of the first response for the ticket.
- Cc Emails: Shows the emails of all people who would get notifications about the request.
- Template: Shows the name of the template used to create the request.
- Request Type: Shows the type of the request.
- Request Age: Shows the age of the ticket in terms of duration between the creation and the current Date and Time.
- Last Update Date: Shows the date and timestamp of the last activity on the request.
- Last Approved Date: Shows the date on which the ticket’s status was last updated to Approved.
- Created By: Shows the user by whom the ticket was created. Click on the name to view the user details.
- Last Updated By: Shows the user by whom the ticket was last updated. Click on the name to view the user details.
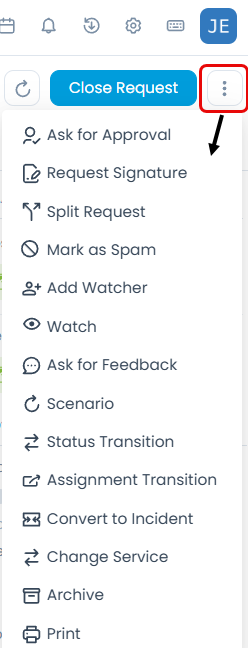
Request Actions
At the top right corner of the page, you will see a set of actions.
- Previous: Click to go to the previous request.
- Next: Click to go to the next request.
- Close: Click on the Close button to close the request. Click here to see what happens when you close a request.
- More Actions: Click on the vertical 3 dots to see other actions available for the request.