CI Type
Streamline your CMDB by defining and managing diverse Configuration Item (CI) types, ensuring accurate categorization and flexible asset tracking.
A CI type determines the kind of CI (configuration item) added to the portal. It is a predefined catalog of CI types that provides a generic umbrella term for every CI in the management system.
To view the CI Type page, navigate to Admin > CMDB > CI Type.
Here, you can view a list of default CI types and add custom ones. You can add sub CI types up to five levels deep.
Barcode functionality is not supported.
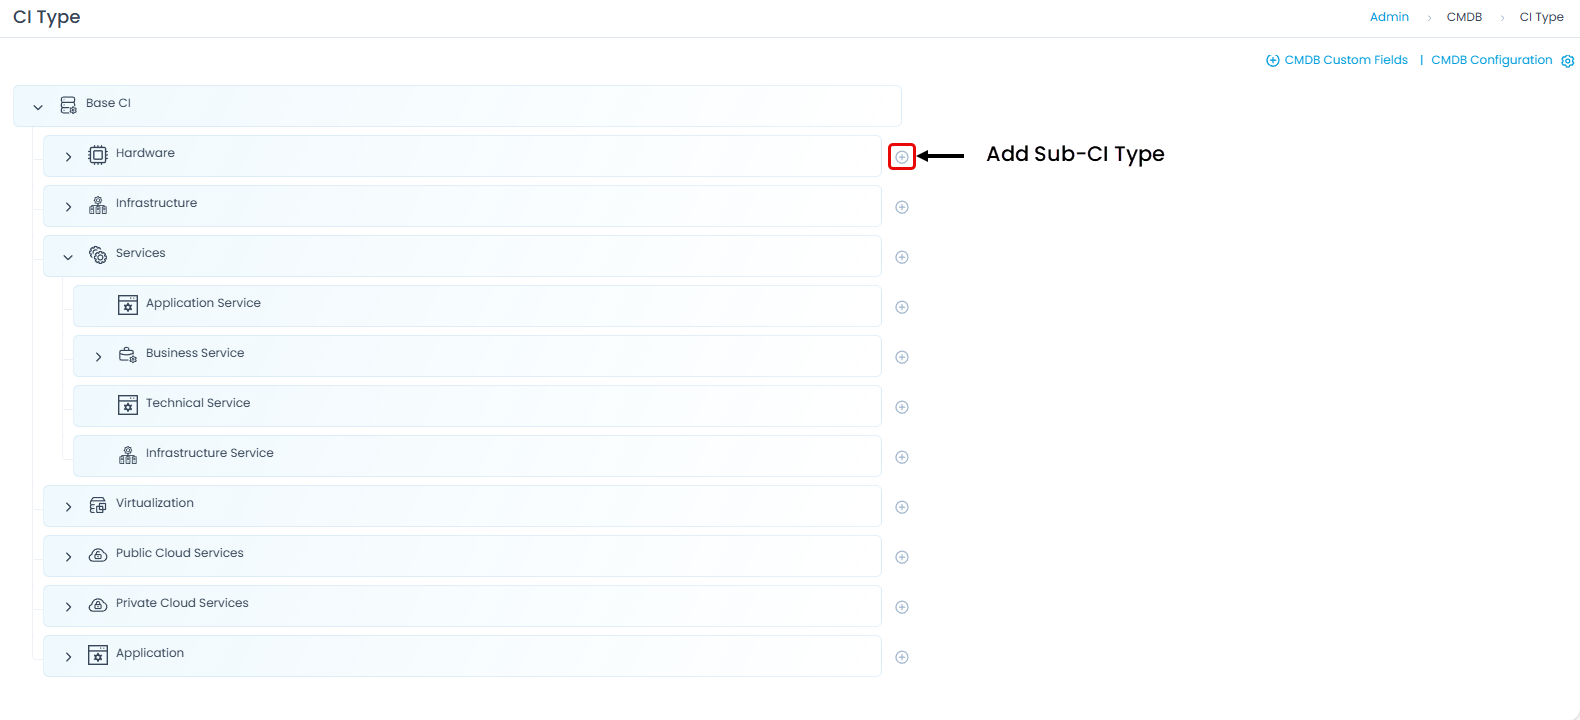
Adding a Sub CI Type
To add a sub CI type to any CI type:
- Click the Add icon next to the desired CI type (For example, Hardware) and the Create CI Type page appears.
- Enter the CI Type name.
- Upload a CI type icon if required.
- Enter the CI Prefix if required. A maximum of 10 characters are allowed.
- Enter the Unique Name Identifier.
- Provide a brief Description of the CI.
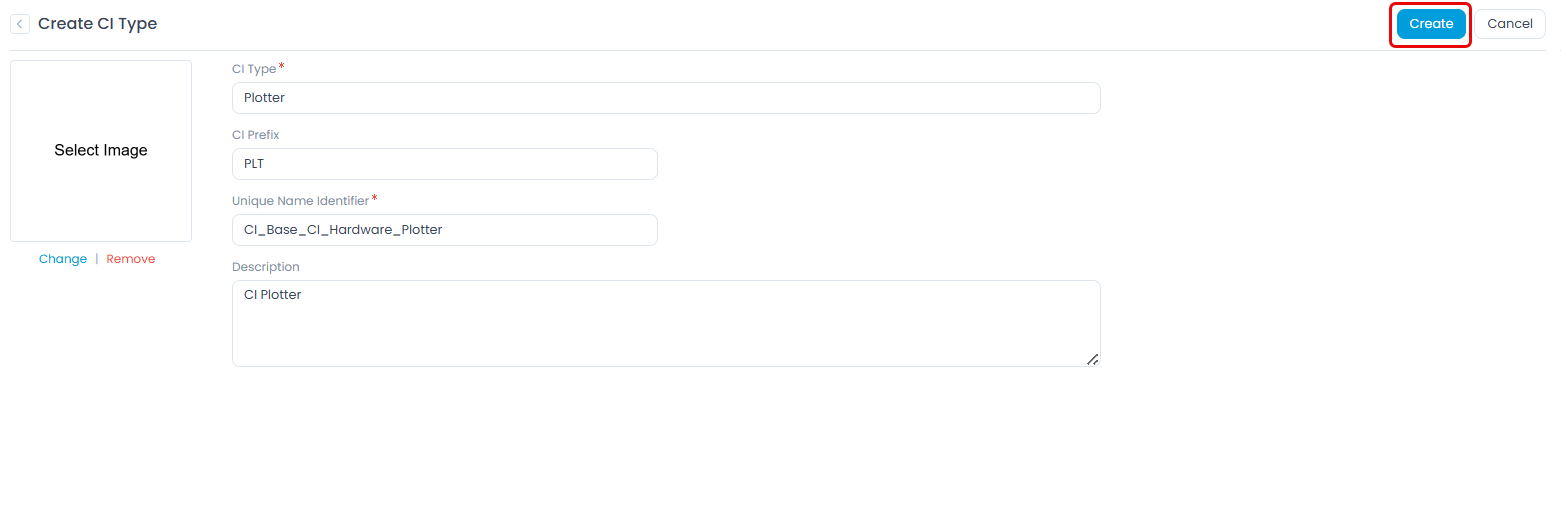
- Click Create. The details page appears as shown below.
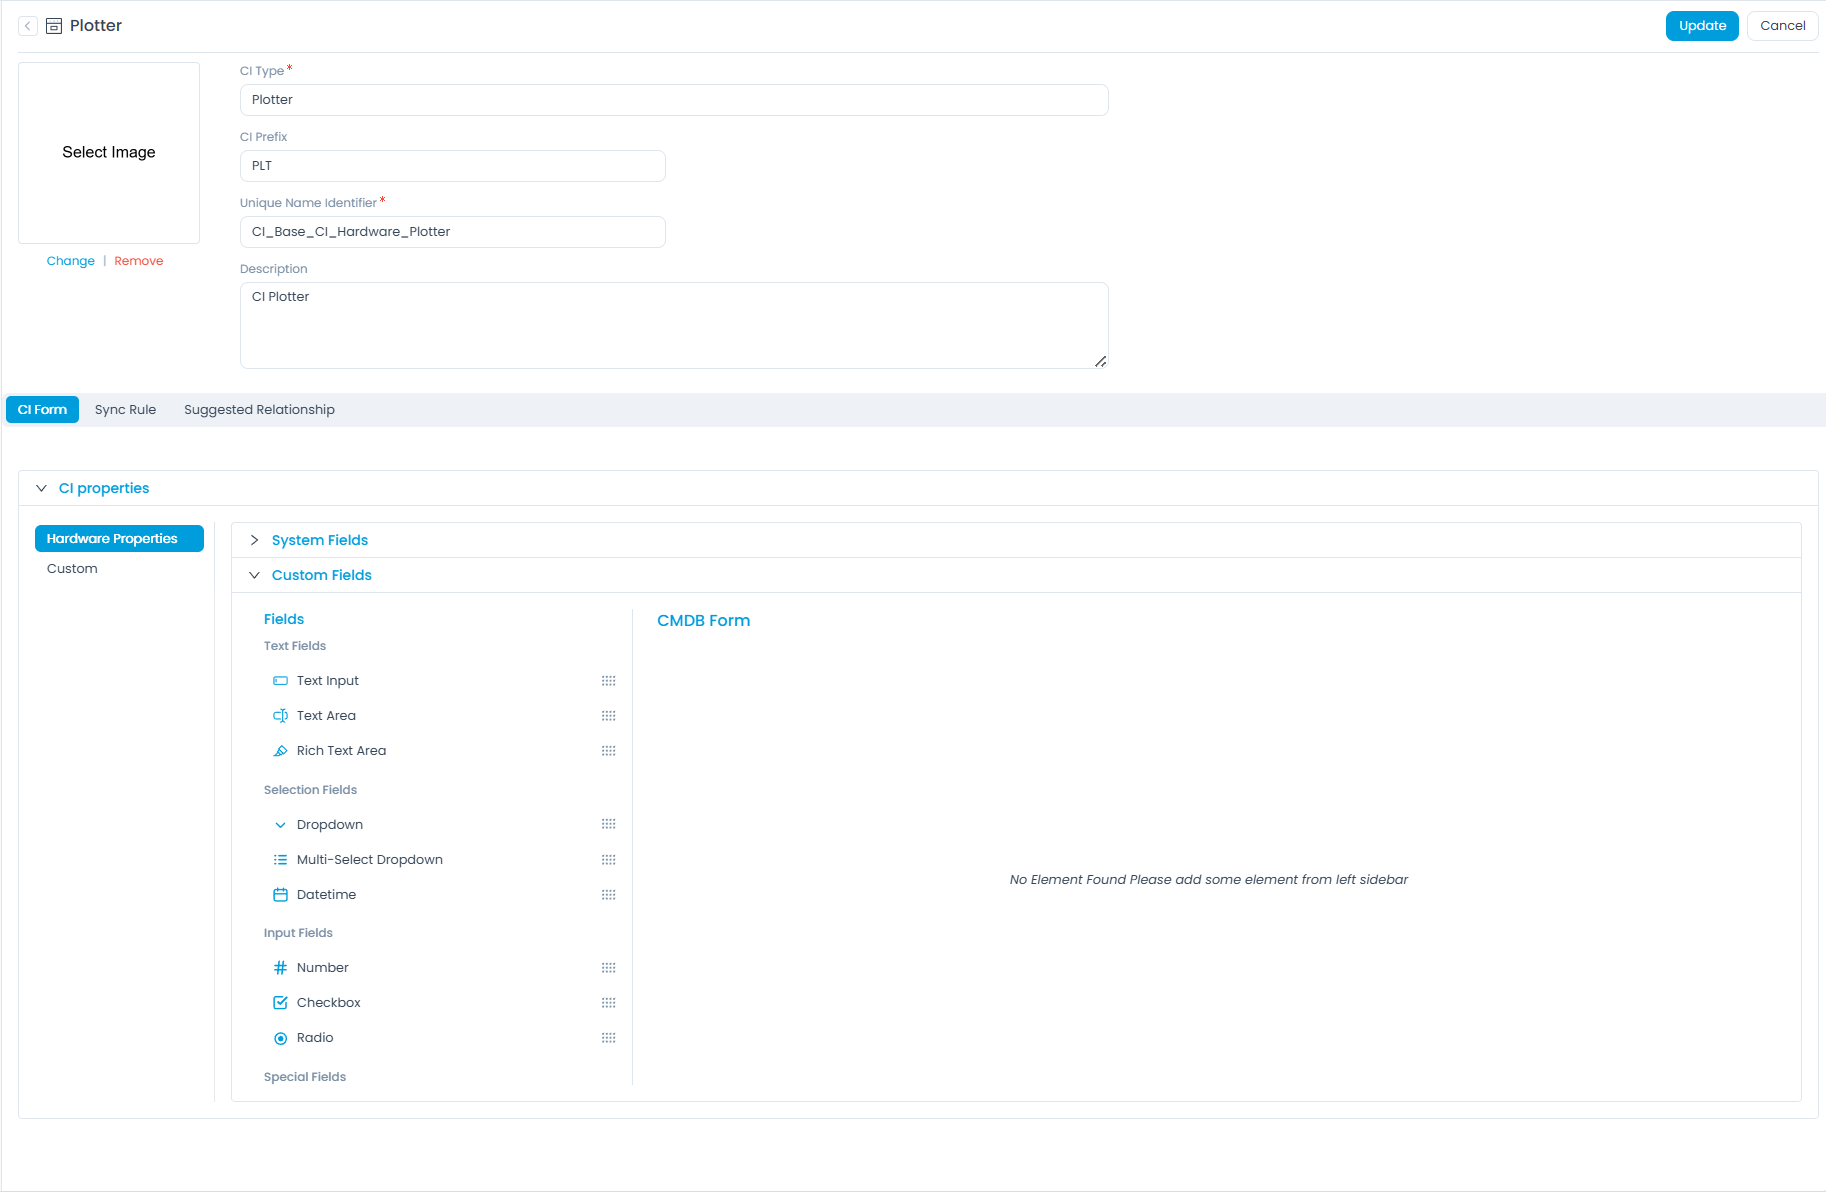
You can now design the CI form for this CI type or add sync rules that create an asset during discovery. The page has the following tabs:
- CI Form: Enables you to design the form by adding new custom fields in the properties of the CI type and in the sub CI type form itself.
- Sync Rule: Enables you to create rules to synchronize the Configuration Items with Assets.
- Suggested Relationship: Enables you to create relationships between specific CI types, simplifying the process of establishing meaningful relationships when created manually.
CI Form
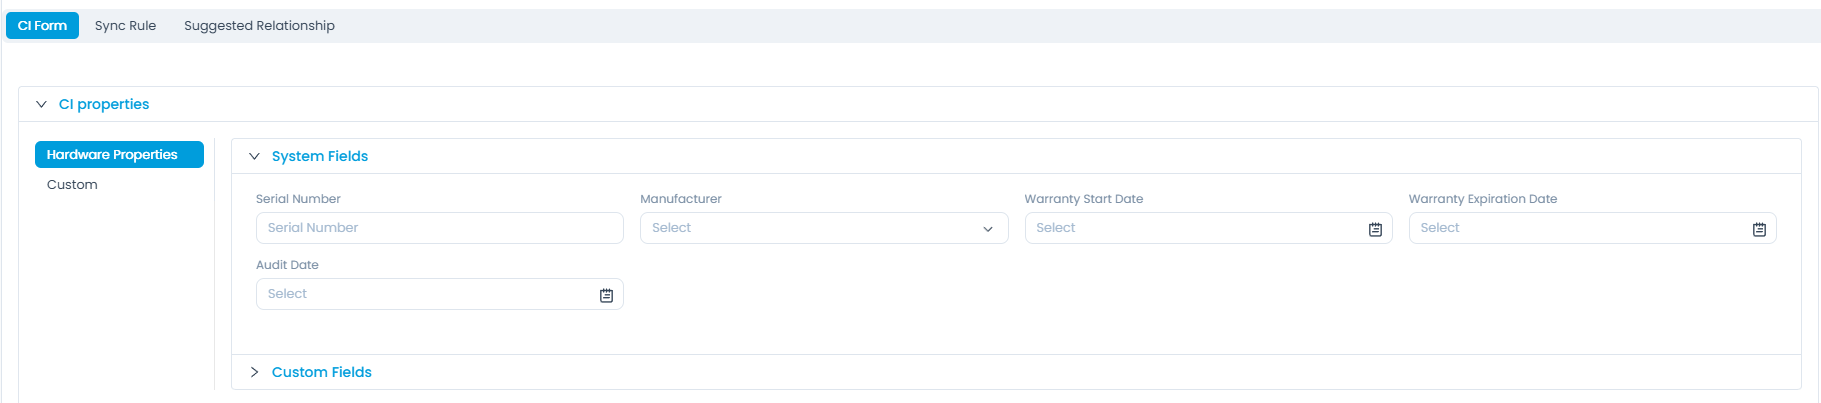
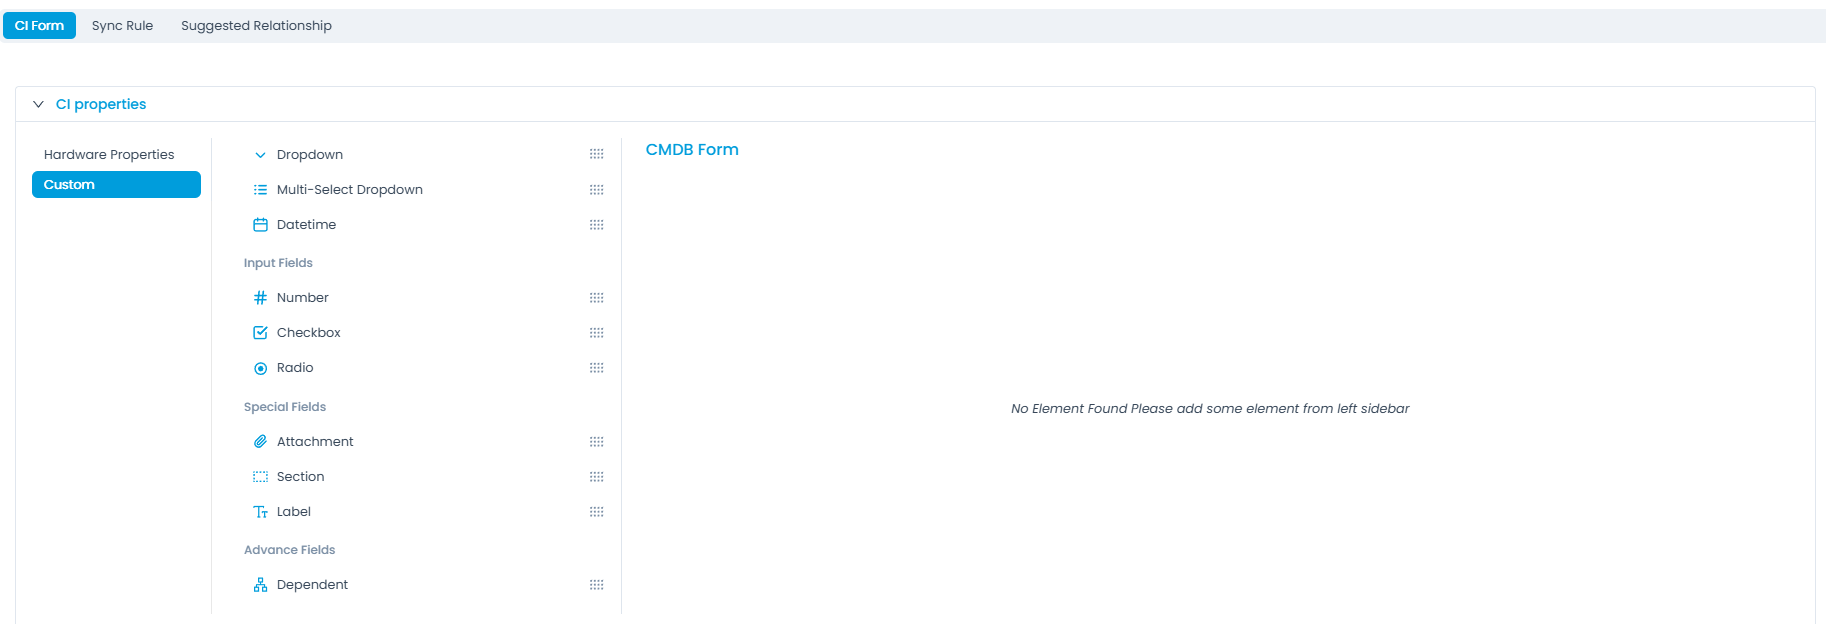
CI form enables you to view the system fields and add custom fields either to the properties or to the CI type form.
For example, in the Hardware Properties tab, you can view its system fields and add custom fields to it, as shown below.
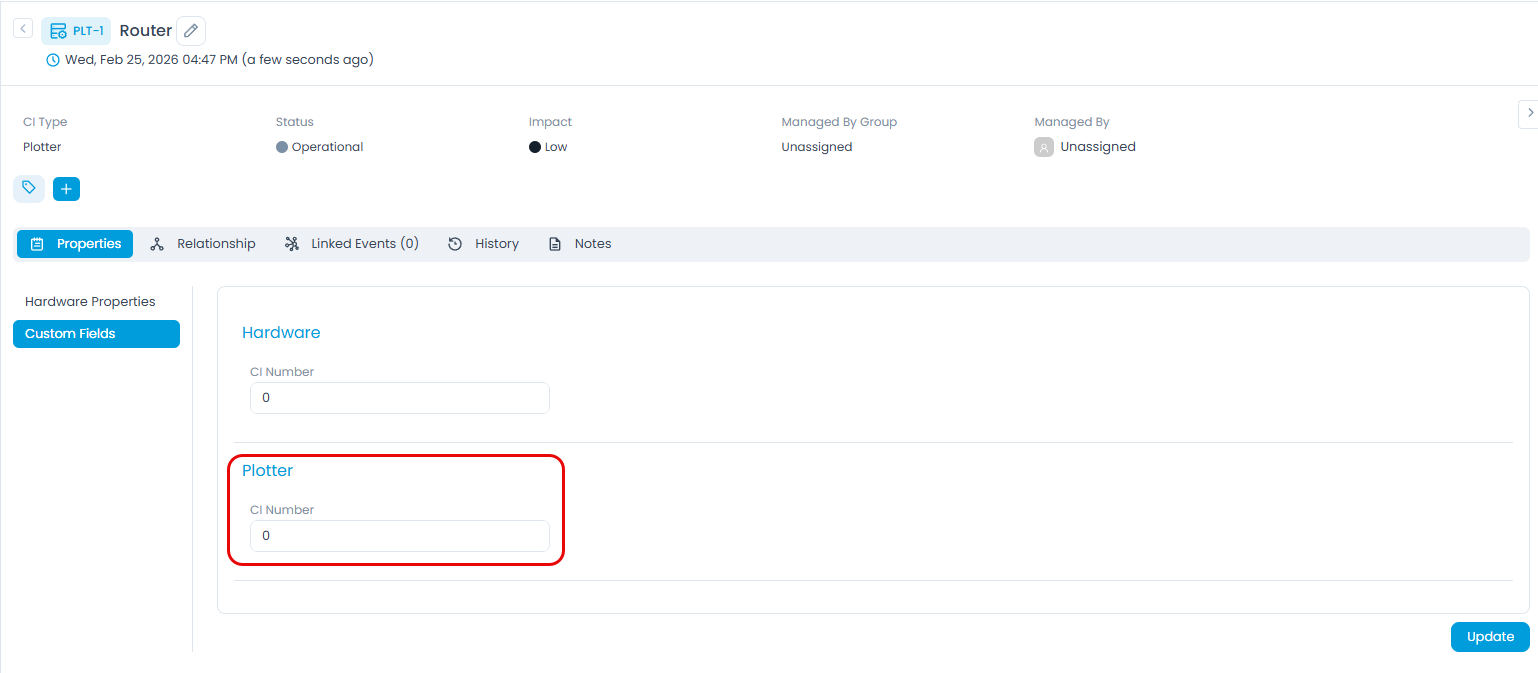
Additionally, you can add custom fields to the form for this CI Type (Plotter) as shown below.
The custom field you add appears in the Custom Fields section of the Router Properties tab, as shown below.
Sync Rule
Sync Rules in CMDB (Configuration Management Database) are designed to streamline the process of asset creation and CI (Configuration Item) management by automating the link between them. These rules allow the system to automatically create an asset when a new CI is created, and vice-versa, based on predefined conditions and criteria.
For instance, if a CI meets specific attributes or conditions, such as being classified as a certain type (e.g., hardware or software), Sync Rules can trigger the creation of a corresponding asset in the asset management system. This ensures that your CMDB and asset repository remain in sync without requiring manual intervention. Similarly, when an asset is added that meets certain criteria, a related CI can be created in the CMDB to maintain consistency across systems.
Key benefits of Sync Rules include:
- Automation: Reduces manual tasks and the risk of human error by automating the creation and synchronization of assets and CIs.
- Consistency: Ensures that the asset inventory and CMDB are always aligned, preventing discrepancies between the two.
- Efficiency: Speeds up the process of asset and CI management, making it easier to track and manage IT resources.
- Scalability: Allows for seamless scaling of asset and CI management processes as your organization grows, without adding additional administrative overhead.
By setting up these Sync Rules, organizations can maintain an accurate and up-to-date view of their IT infrastructure, improving operational efficiency and asset visibility.

To create a Sync Rule:
- Click Create Sync Rule. The following page appears.

Enter the following details:
- Name: Enter the name of the Sync Rule.
- Description: Enter a brief description about the rule.
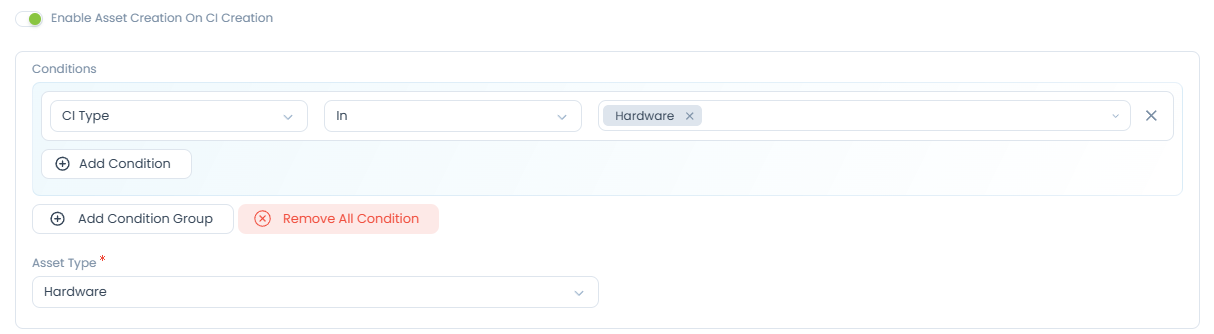
- Enable Asset Creation on CI Creation: Enable this option to create an asset when a CI is created, based on a condition. If enabled, select the condition and the asset type based on which the asset should be created. For example, if the CI Type is Hardware, an asset of the Hardware Type is created.
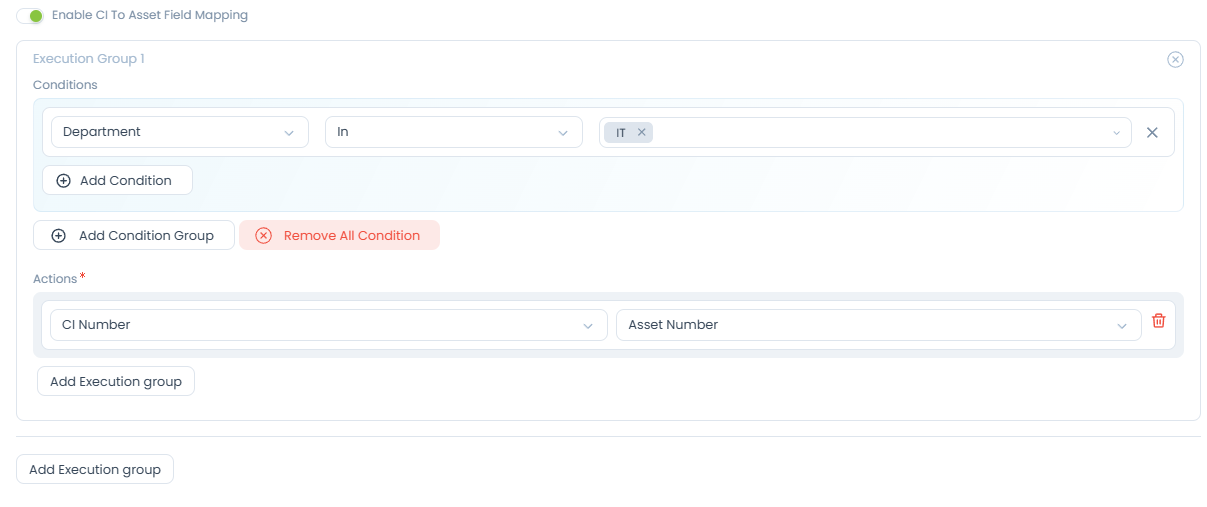
- Enable CI to Asset Field Mapping: Enable this option to map CI custom fields to asset custom fields based on the condition groups. A maximum of 5 condition groups can be created. For example, if the CI department is IT, the custom field "CI Number" is mapped to the "Asset Number" custom field, as shown below.
Once done, click Create. The Sync Rule is created. Now, if the rule is enabled, whenever the CI is created, this rule will execute and create the asset automatically. The created rule appears on the list page as shown below.
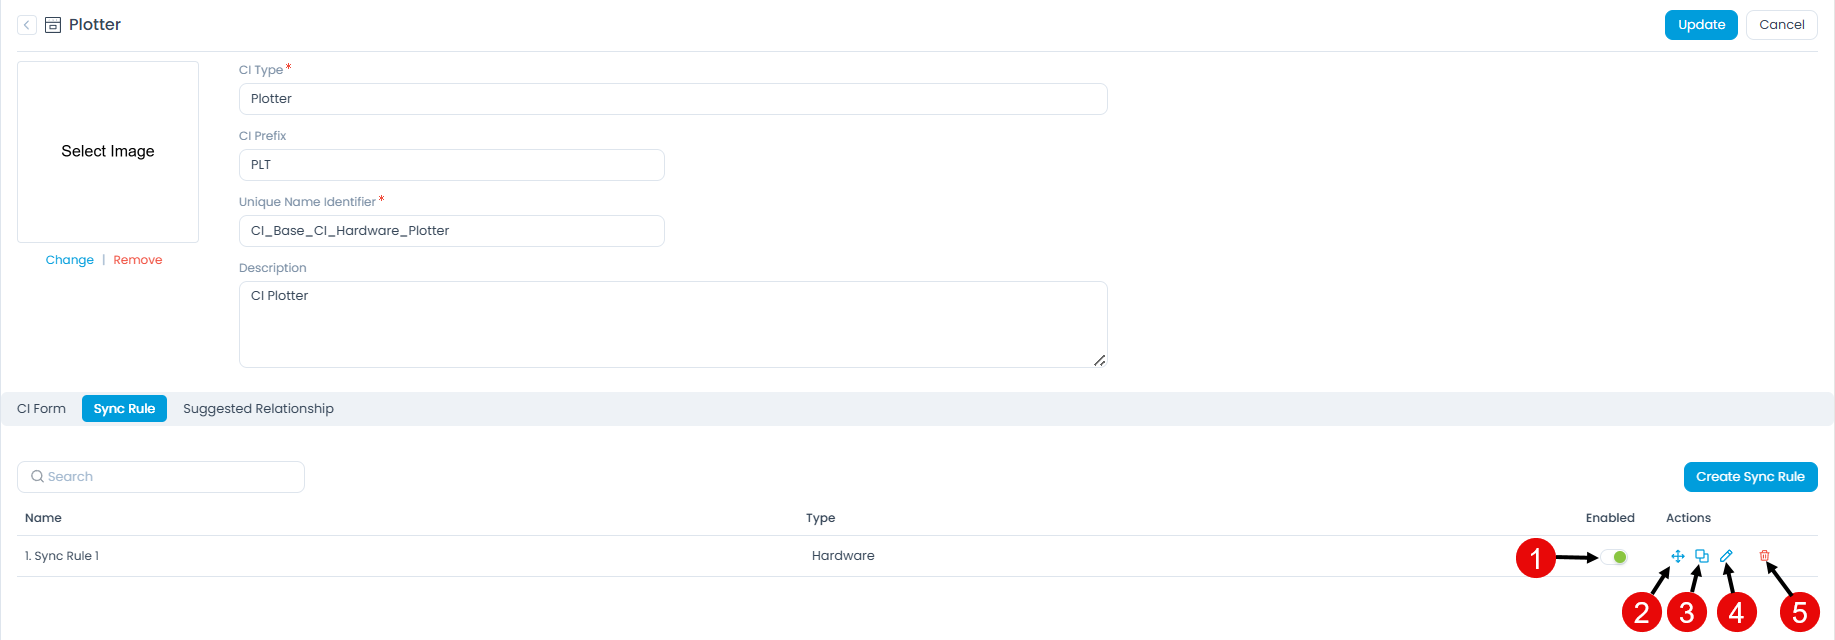
On this page, you can do the following:
- Enabled: Enable or disable the rule.
- Reorder: Set the priority of the sync rule. The rule will execute based on this priority. The first rule will have the highest priority, and the rest will follow.
- Duplicate: Create a duplicate rule if required.
- Edit: Edit the rule if required.
- Delete: Delete the rule if required.
Suggested Relationship
This tab enables you to create automated and guided relationship mapping between specific CI types, simplifying the process of creating relationships manually. Example: For the "Desktops" CI type, users can define relevant relationships, such as "Desktops Connected to Network Devices".
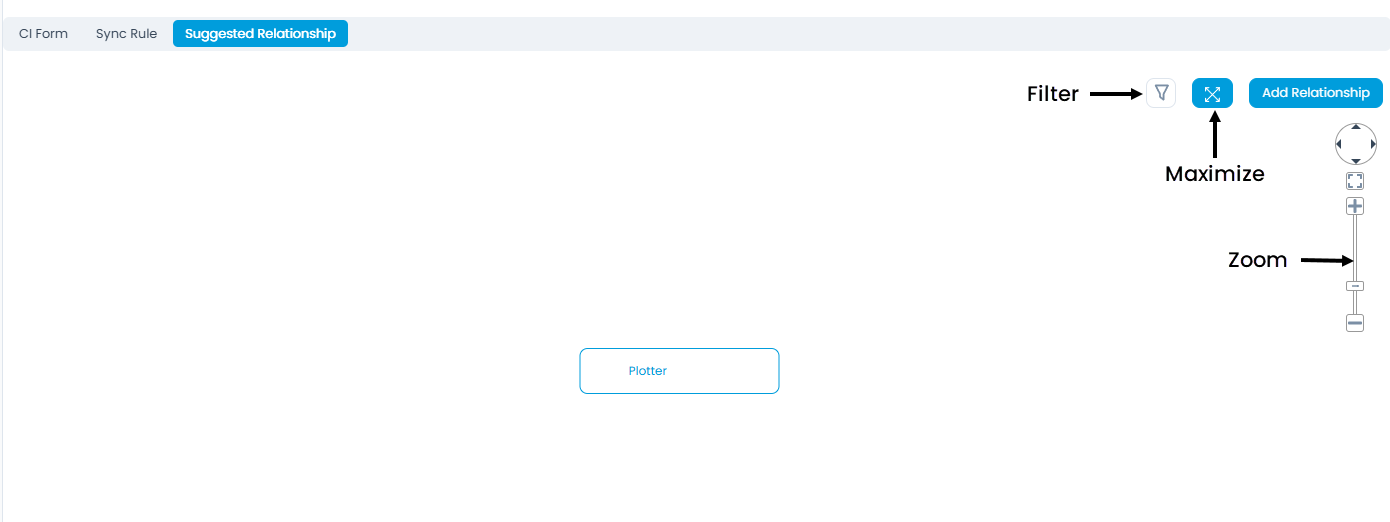
To add a relationship:
- Click Add Relationship. The following popup appears.
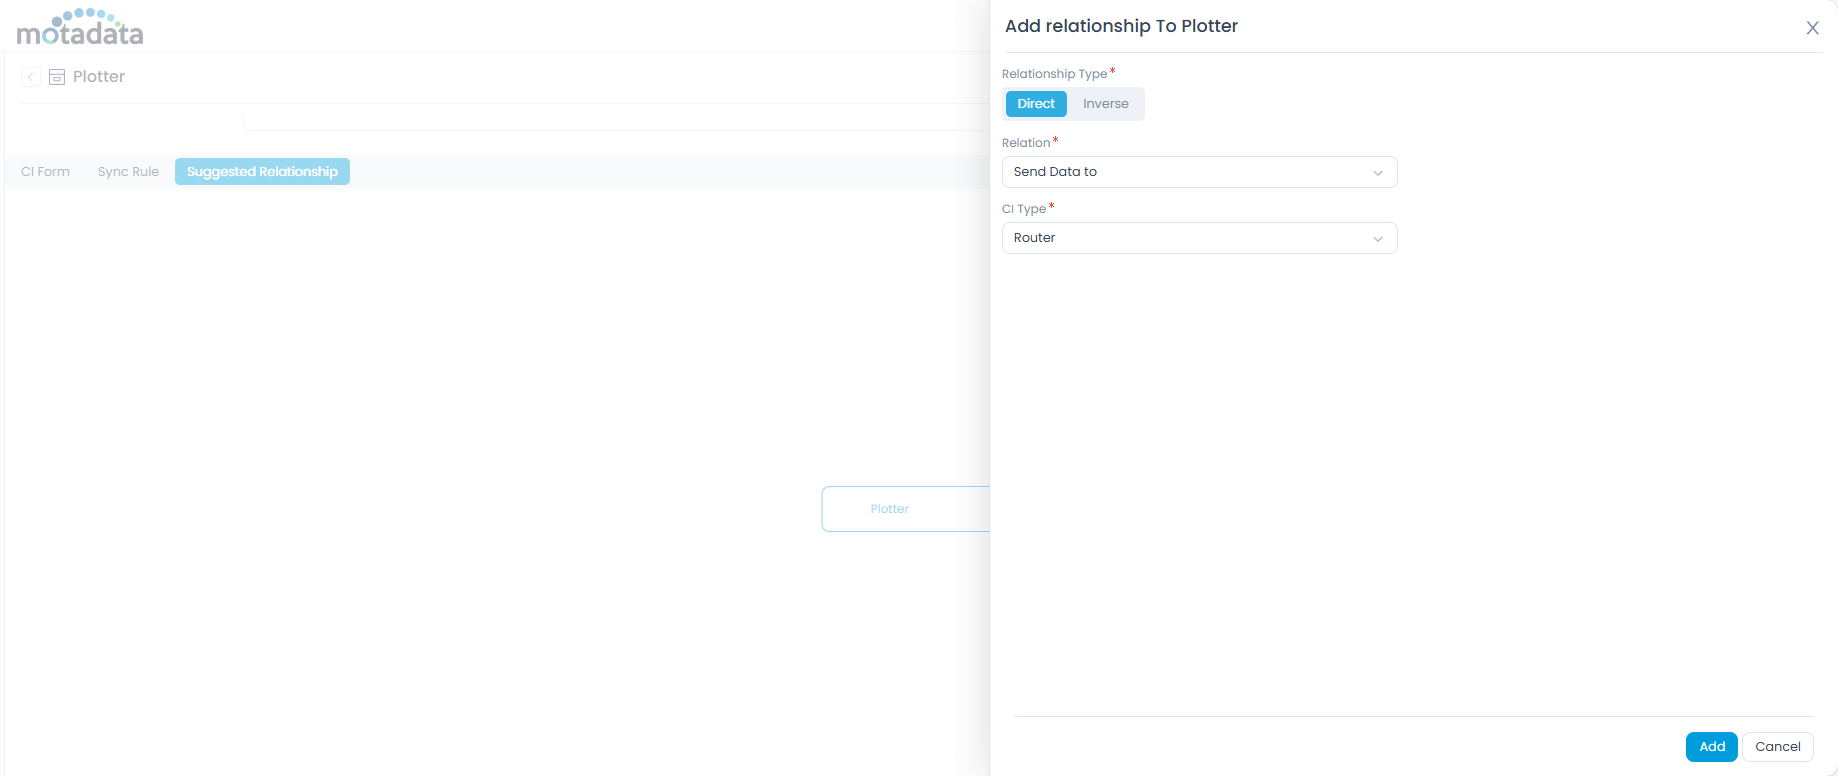
- Enter the following details:
- Relationship Type: Select the type of relationship you want to create. The options are: Direct and Inverse.
- Relation: Select the relation.
- CI Type: Select the CI type with which the relationship is created.
- Once done, click Add. The relationship appears on the list page, as shown below.
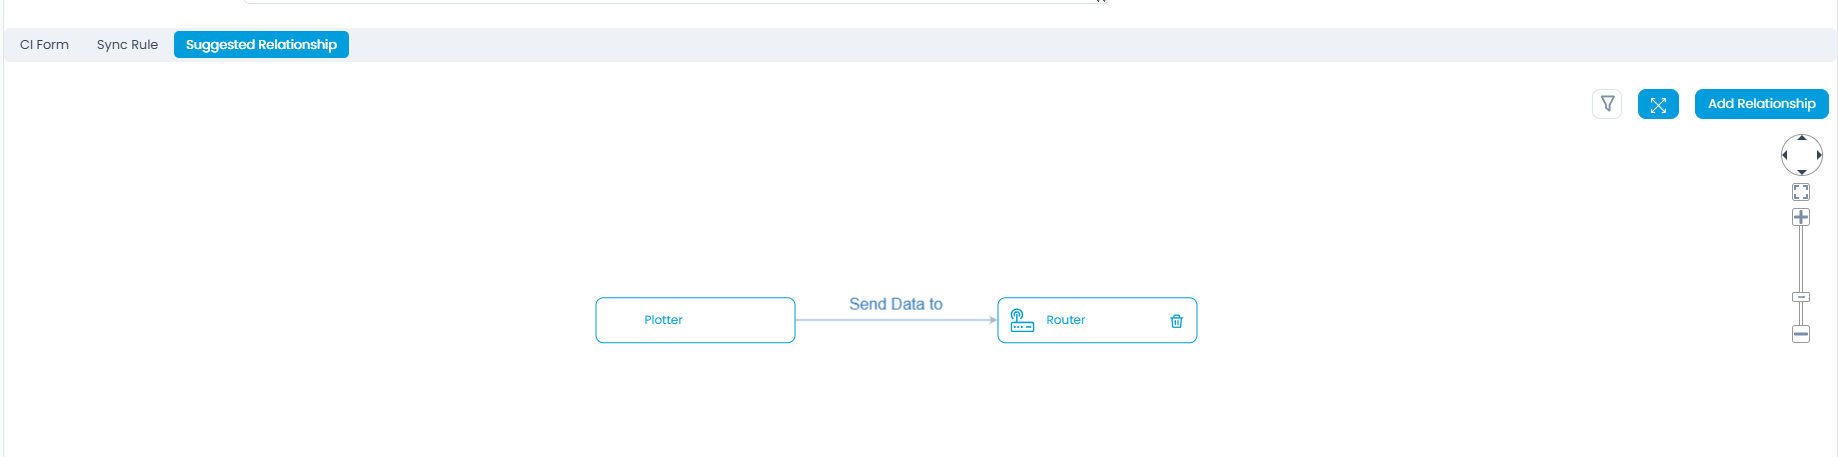
- You can use this suggested relationship when creating a relationship from the relevant CI details page, as shown below.

After you finish configuring the settings, click Update to save your changes.
CMDB Custom Fields
This section allows you to add custom fields to the default CMDB form template at the global level. This means the custom field will be available for all the configuration items.
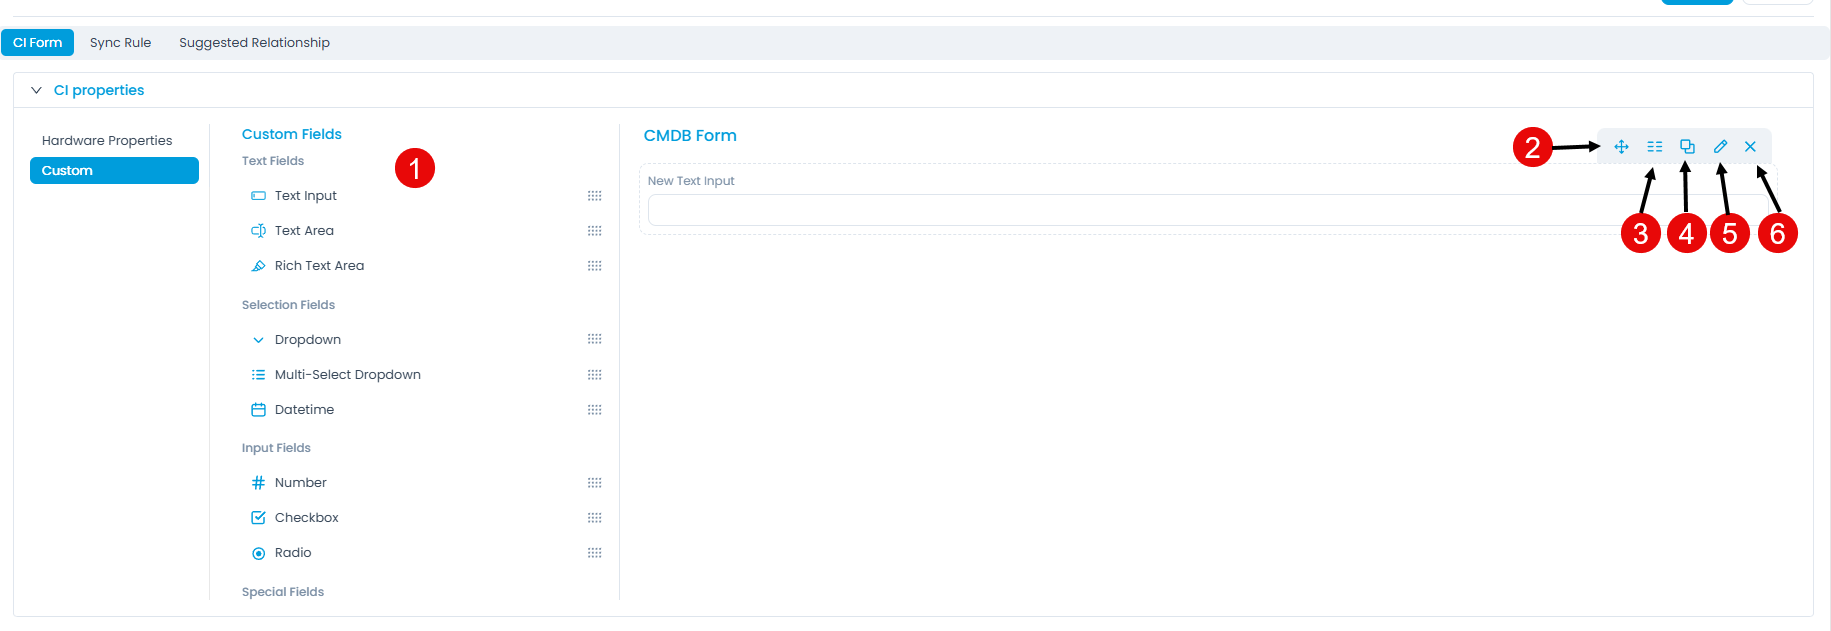
Here, you can customize the CMDB form using the below options:
- Field Palette: Drag and drop fields from the palette to add them to the form.
- Reorder: Drag and drop fields to change the order of the form.
- Expand/Collapse: Expand or collapse fields to display one or two fields per row. If collapsed, the field width is reduced by half. This option is available for both default and custom fields.
- Duplicate: Create duplicate custom fields.
- Edit: Edit fields to make them mandatory, show them on the CMDB form, or change their characteristics.
- Remove: Delete custom fields.
Deleting a custom field removes the field and its data from all related requests. Also, the Workflows, Scenarios, SLAs, and other components containing these custom fields might be affected. Review the impact before removing the field.
CMDB Configurations
Here, you can configure the starting number and the minimum number of digits for the configuration item's CI ID.

The CI ID is based on the configured starting number. Also, you can view the Current CI Number according to which you can define.
For example, if the starting number is set to 100and the minimum digits are set to 1, the CI ID will be CI-100 when the CI is created.