Chat Support
Get immediate assistance from support technicians through real-time chat conversations and automated responses.
Chat Support is a real-time communication feature that enables you to:
- Get immediate assistance from online technicians
- Receive automated responses for common queries through the virtual agent
- Share files and documents with technicians during conversations
- Access knowledge articles directly through the chat interface
- Create requests directly from chat conversations
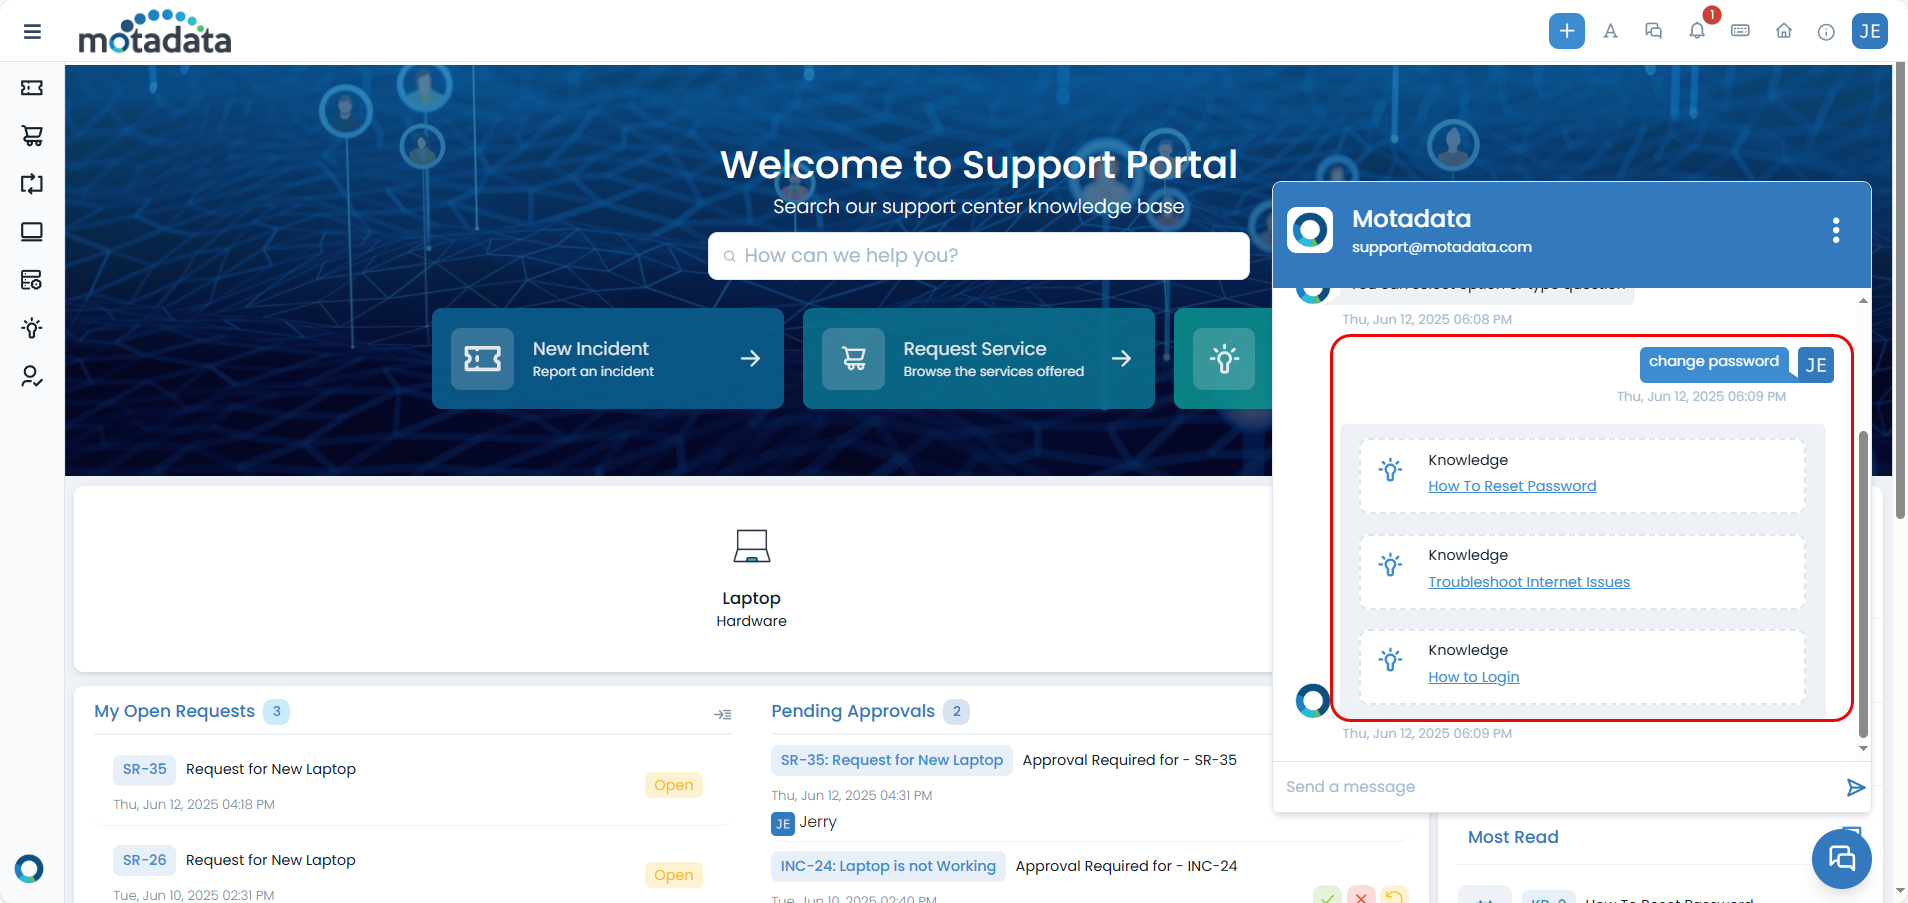
- Reset passwords if your account is locked or you've forgotten your password
- Continue conversations even as a guest user
Chat Support must be enabled by your administrator to be available. When enabled, you'll see a chat icon on the Support Portal home page.
Access Methods
Chat Icon Location
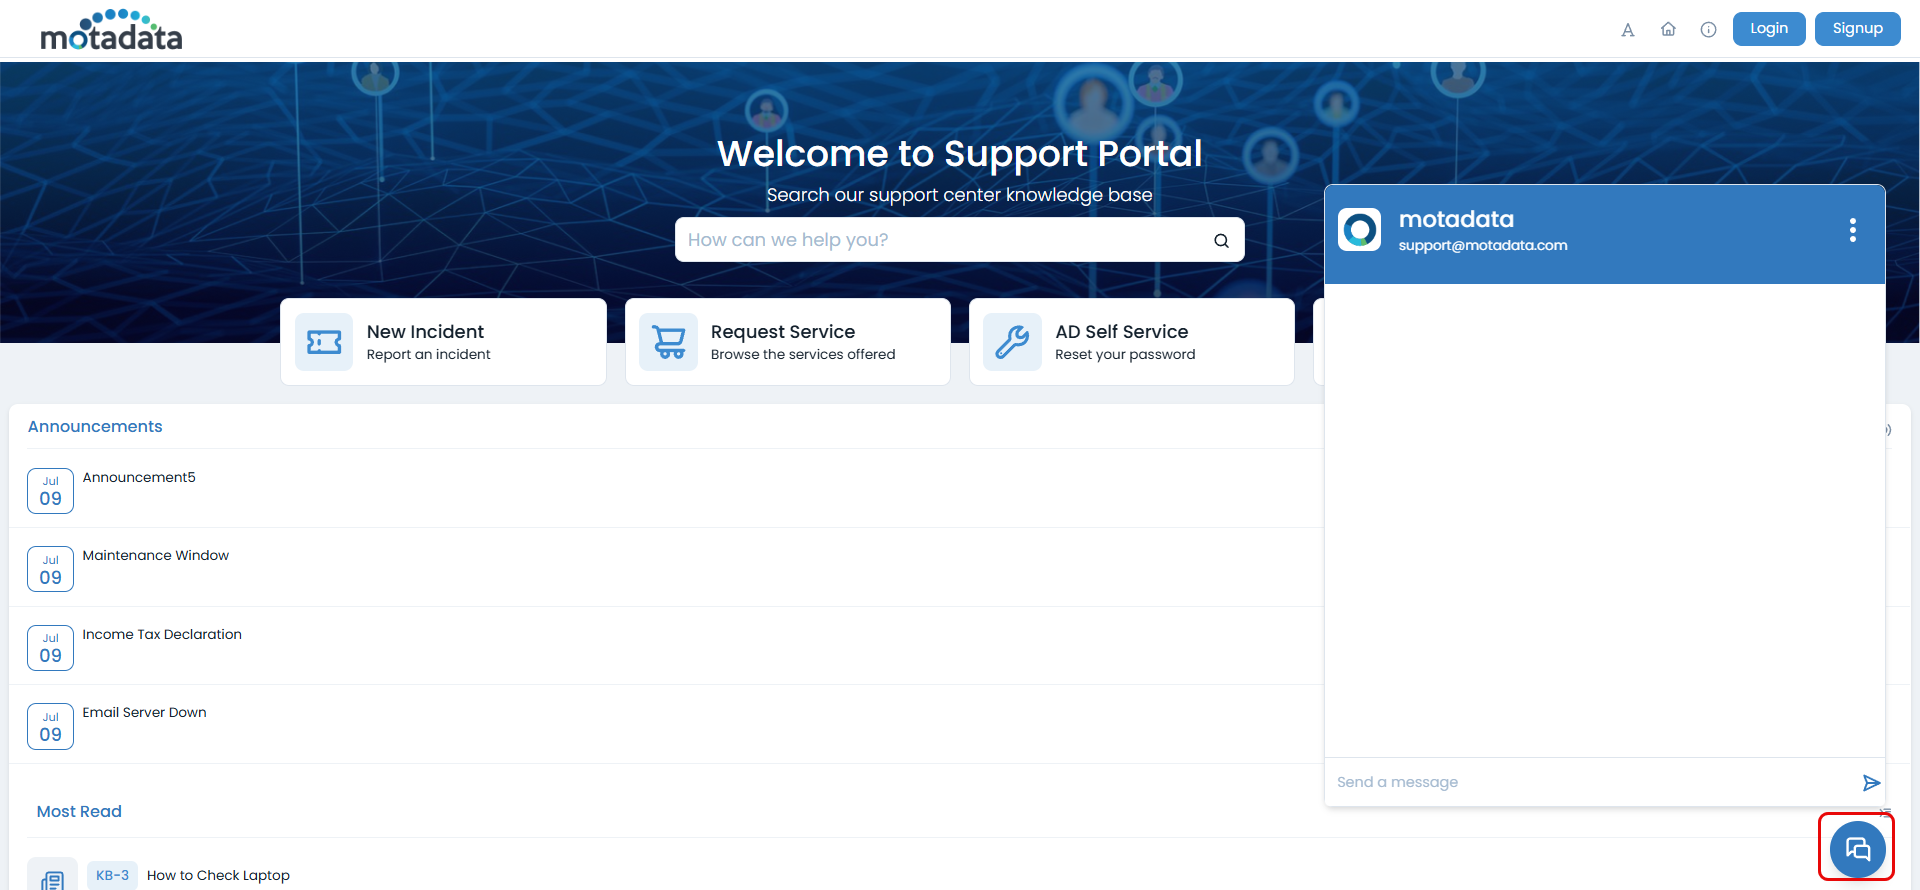
The chat icon appears in the bottom-right corner of the Support Portal when the feature is enabled. The icon is always visible and accessible from any page within the portal.
- Before Login (Guest Access)
- After Login
Even if you're not logged in, you can access chat support for basic assistance:
Step 1: Click the chat icon in the bottom-right corner of the Support Portal
Step 2: Start a conversation with the virtual agent
Step 3: Request password reset if your account is locked or you've forgotten your password
Step 4: Get basic help for common issues
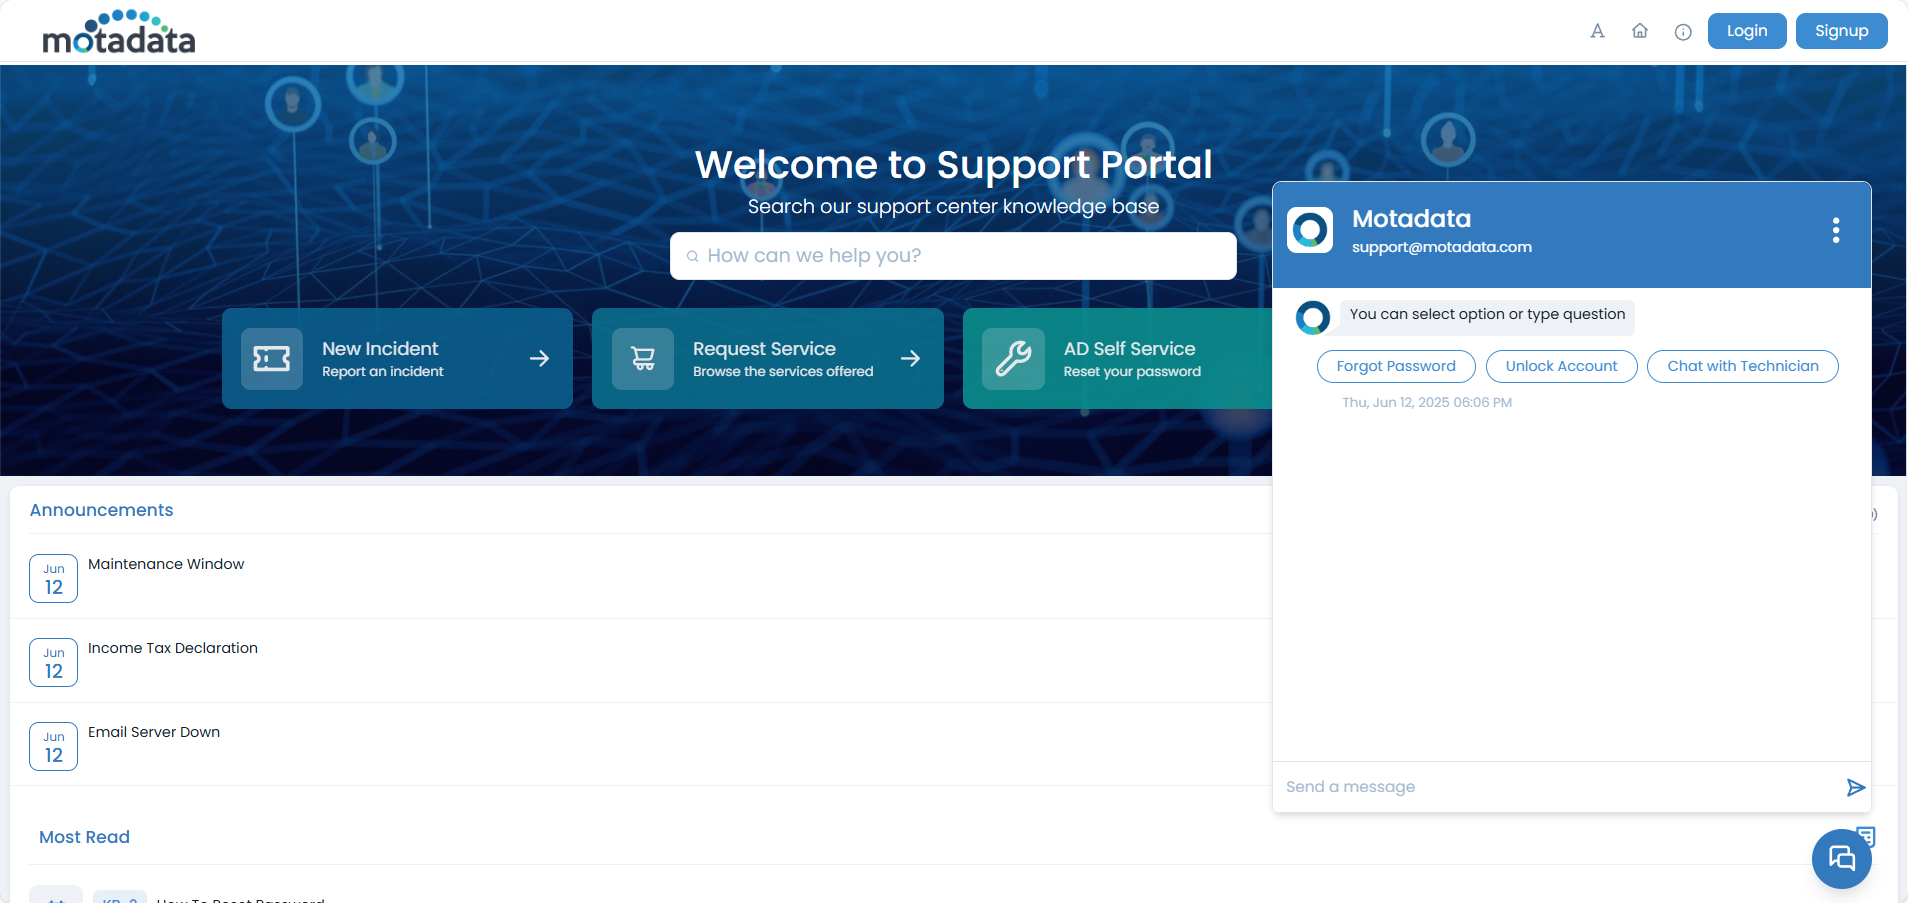
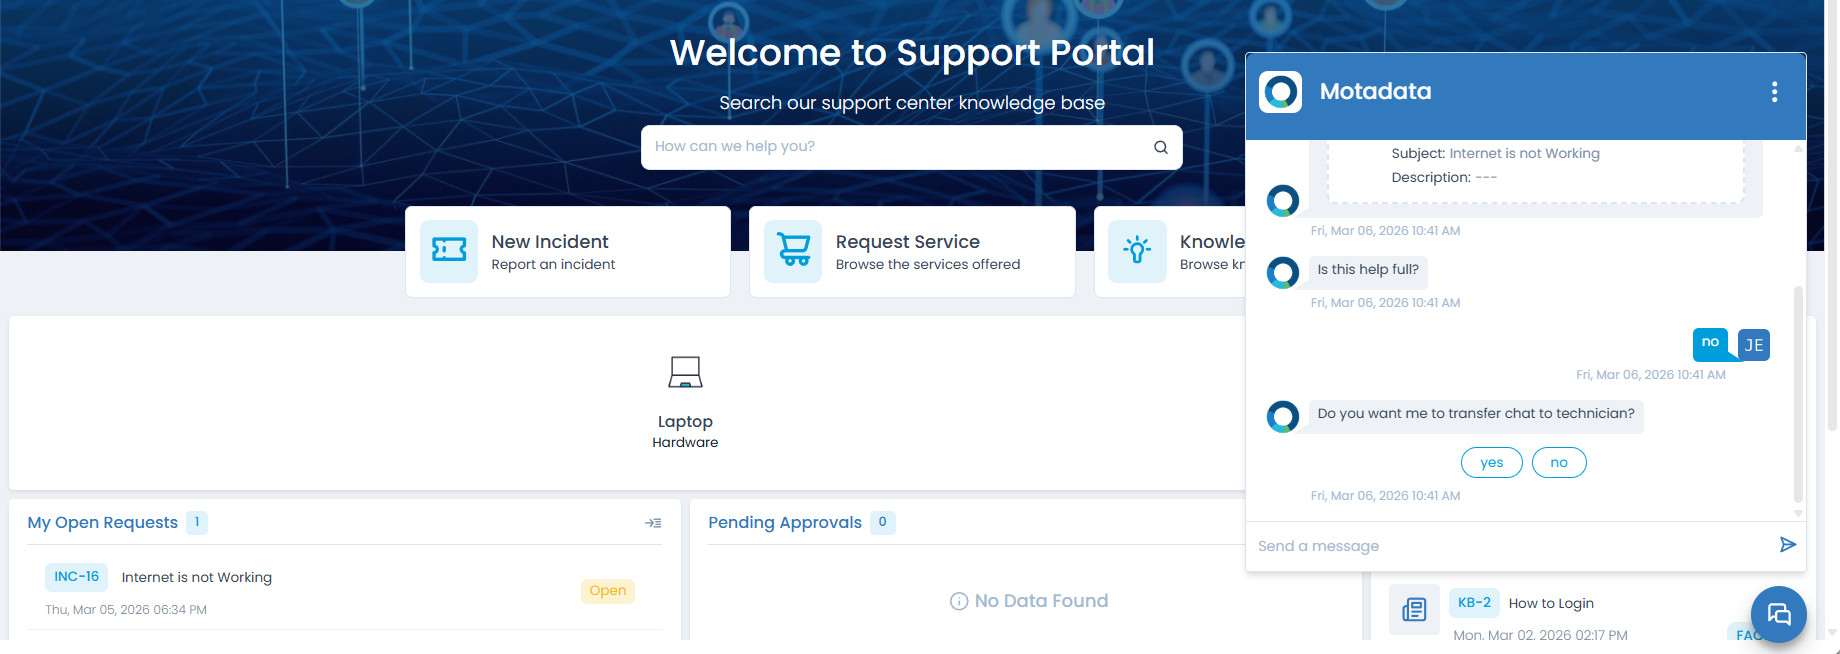
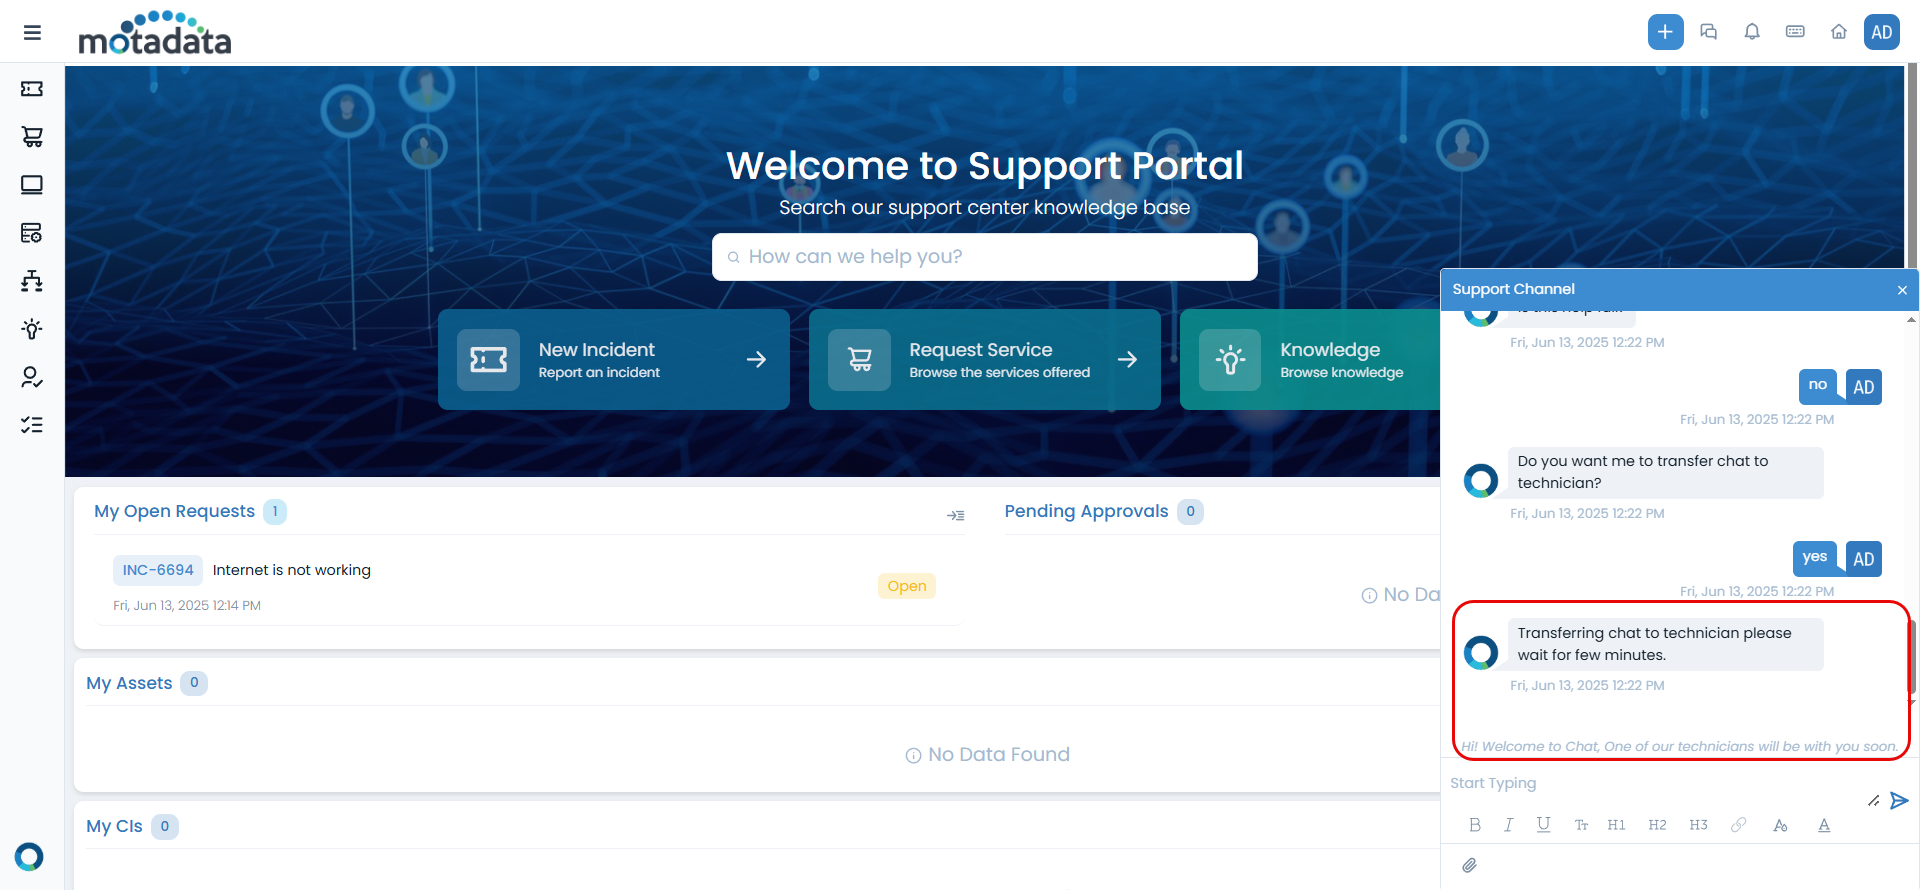
When you initiate a conversation to chat with the technician as a guest user, you'll be prompted with options to:
- Sign Up: Create a new account
- Login: Use existing credentials
- Continue As Guest: Proceed without creating an account
Guest users can access chat support for immediate assistance, even without creating an account. This is particularly useful for password resets and basic troubleshooting.
Once you're logged in, you have access to the following features:
- Click the chat icon to open the chat window. The chat window will appear as shown below.
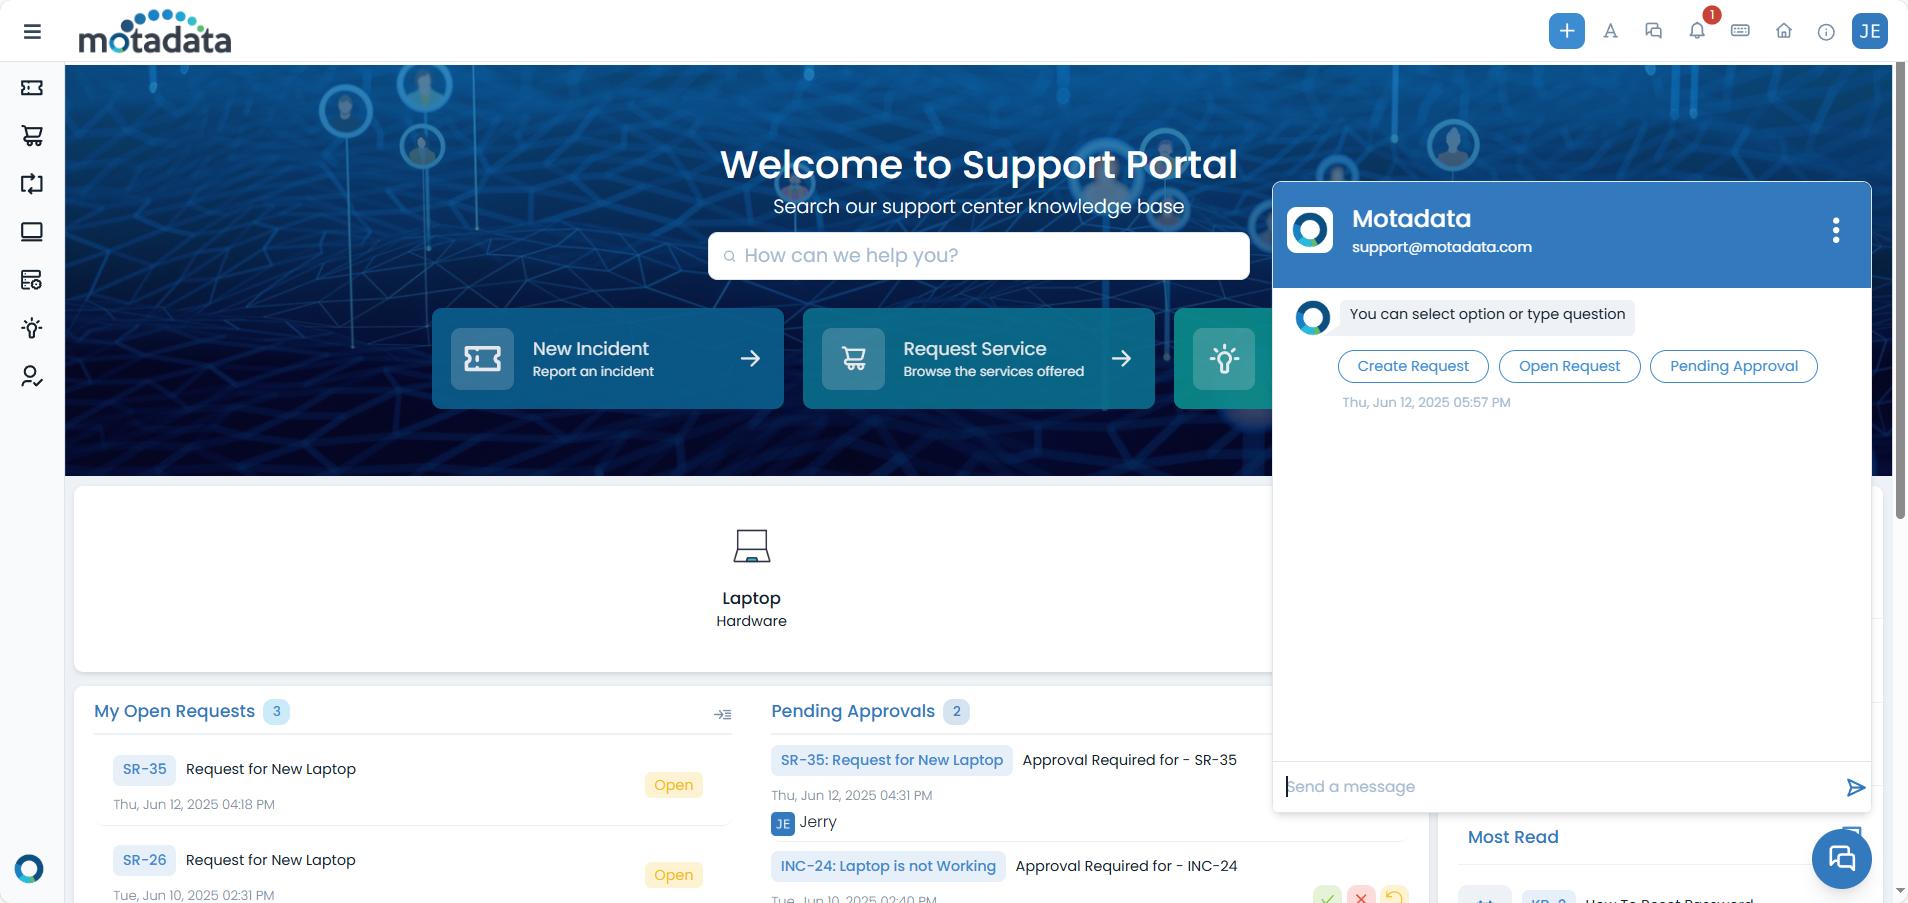
Here, you can select an option or type a question to start a conversation with the virtual agent:
- Select an option: Choose from
Create Request,Open Request, orPending Approvalto quickly initiate a specific type of conversation. - Type a question: Enter your query directly into the chat input field (e.g., "Create Request").
- Select an option: Choose from
Access your chat history through the Chat Console.
Chat Interface
This section details the key components and functionalities of the chat interface, enabling you to effectively communicate with virtual agents.
Starting a Conversation
Click the chat icon in the bottom-right corner.
Type your message in the text field.
Press Enter or click the send button.
Wait for a response from the virtual agent or technician.
Chat Window Features
The chat window provides several useful features, organized into tabs for easy navigation and interaction:
- Text field: Type your message in the "Send a message" text field. Also, you can format the text using the options available in the rich text editor. The rich text editor supports the following features:
- Bold
- Italic
- Underline
- Headings
- Font Size
- Alignment (Left, Center, Right, Justify)
- Numbered List
- Link
- Import HTML
- Separator Line
- Text Color
- Text Background
- Full Screen
- Send button: Click the send button to send your message.
- Attachment icon: Click to select and share files and documents from your device (images, documents, etc.). This is available only while chatting with the technician.Once selected, the files will be uploaded and shared with the technician during the conversation.

- SaaS version: Files up to 5 MB can be attached
- On-premise: File size limits are configured by your administrator
- Blocked files: Files blocked by admin system preferences cannot be uploaded
- Keywords detection: The system identifies relevant topics.
- Article suggestions: Helpful articles are displayed in the chat
- Direct access: Click to view full articles without leaving the chat
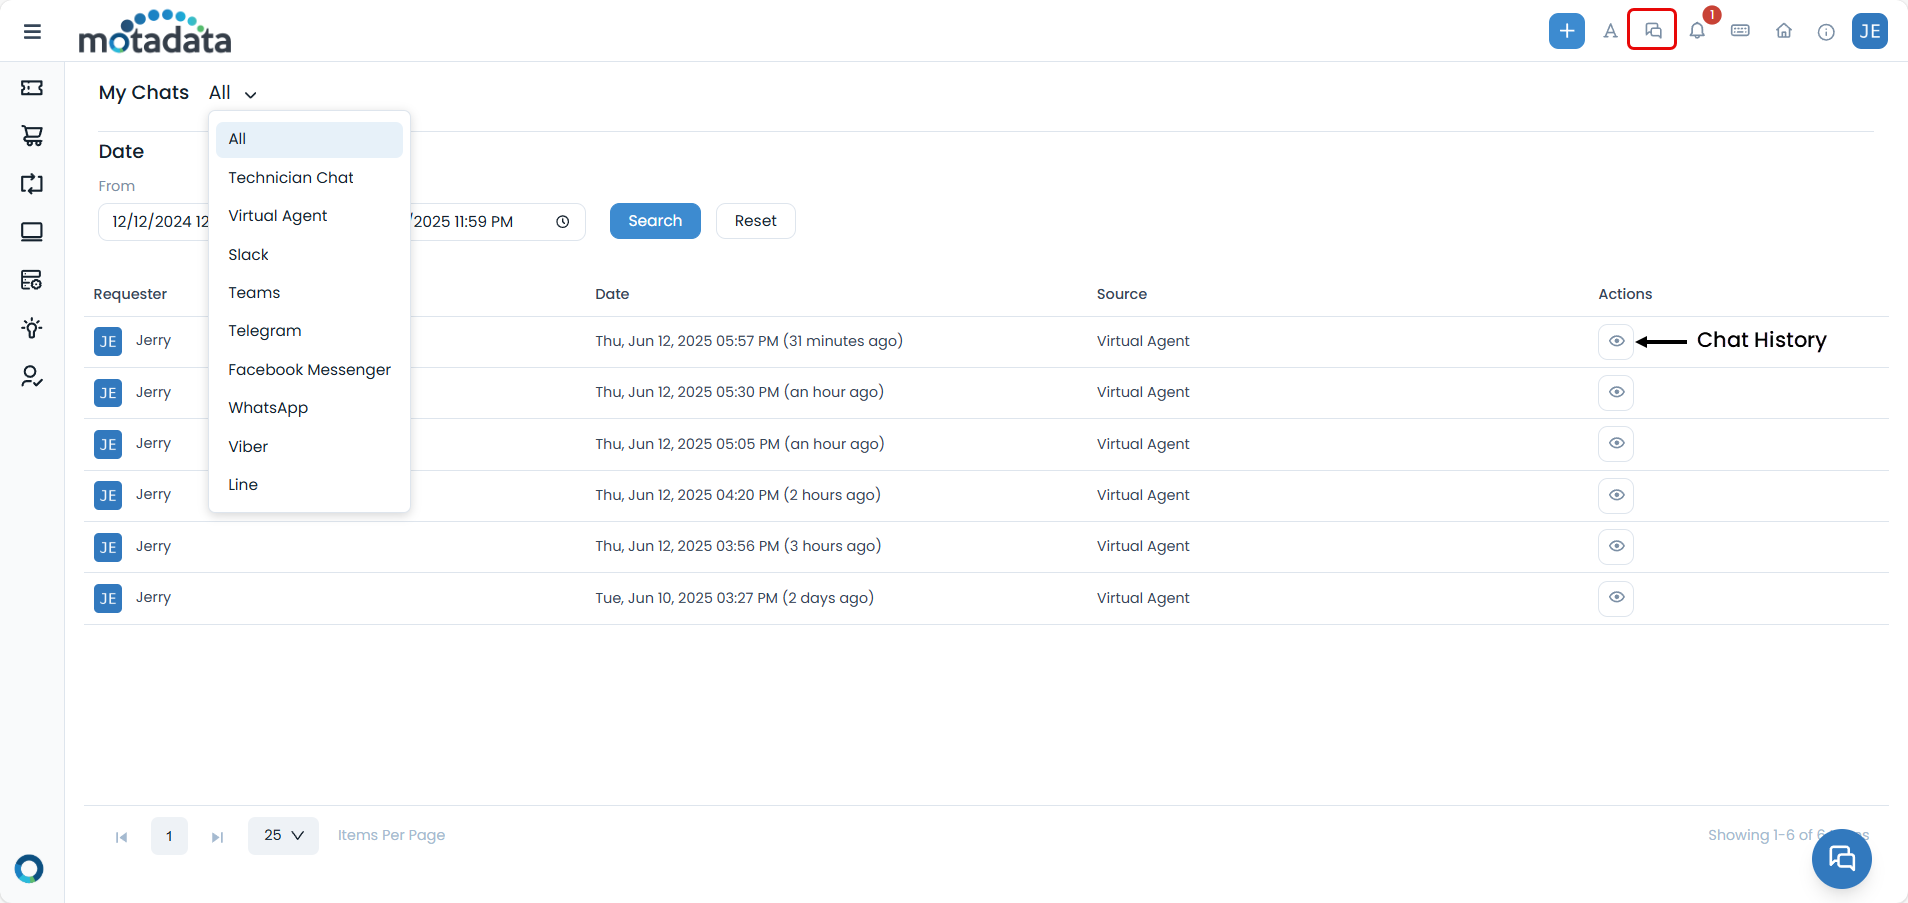
Chat Console (For Logged-in Users)
If enabled by your administrator, you can access the Chat Console to view your chat history:
Click the Chat Console icon in the top header bar
View chat history organized by date and time
Filter by source: Technician Chat, Virtual Agent, Slack, Teams, Telegram, Facebook Messenger, WhatsApp
Review past conversations and responses
The Chat Console icon is only visible if enabled by your administrator in the technician portal.

Chat Types
- Virtual Agent
- Technician Chat
- External Platforms
The virtual agent provides immediate responses to common queries:
- Instant answers to frequently asked questions
- Automated workflows for common tasks
- 24/7 availability for basic assistance
- Knowledge base integration for relevant articles
For complex issues requiring human assistance:
- Real-time conversations with online technicians
- Expert guidance for technical problems
- File sharing for screenshots and documents
- Request creation directly from chat
Chat support can also be accessed through various messaging platforms:
| Platform | Description |
|---|---|
| Slack | Chat through your Slack workspace |
| Microsoft Teams | Access support through Teams |
| Telegram | Use the Telegram bot for assistance |
| Facebook Messenger | Chat through Facebook Messenger |
| Get support via WhatsApp | |
| Viber | Chat with support using Viber Messenger |
| Line | Connect with support via the Line app |
External platform integrations must be configured by your administrator and may require specific setup for each platform.
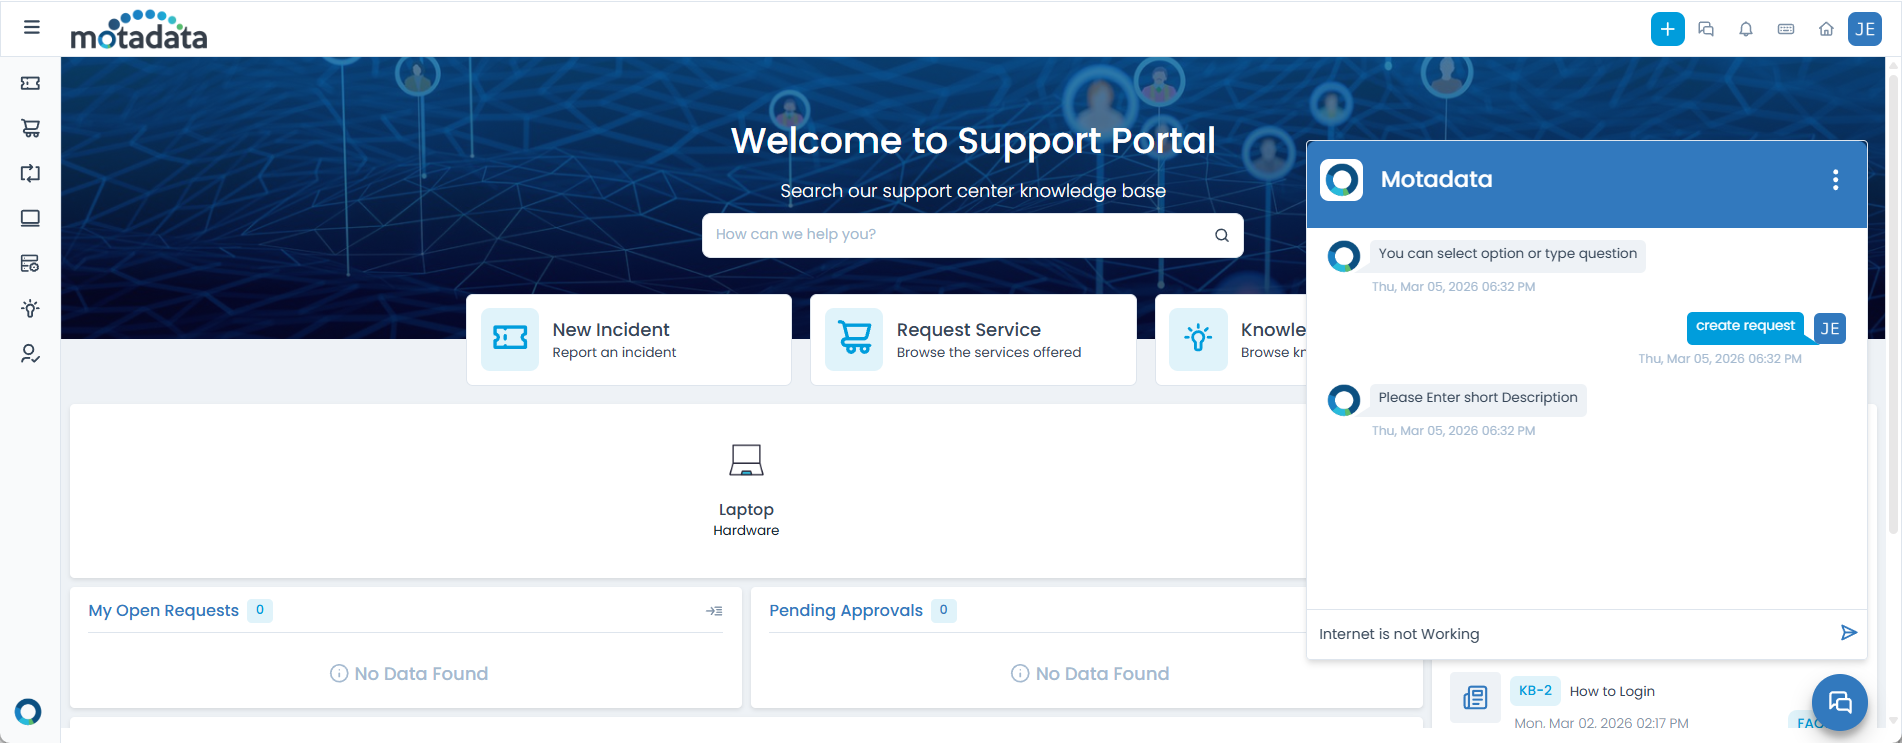
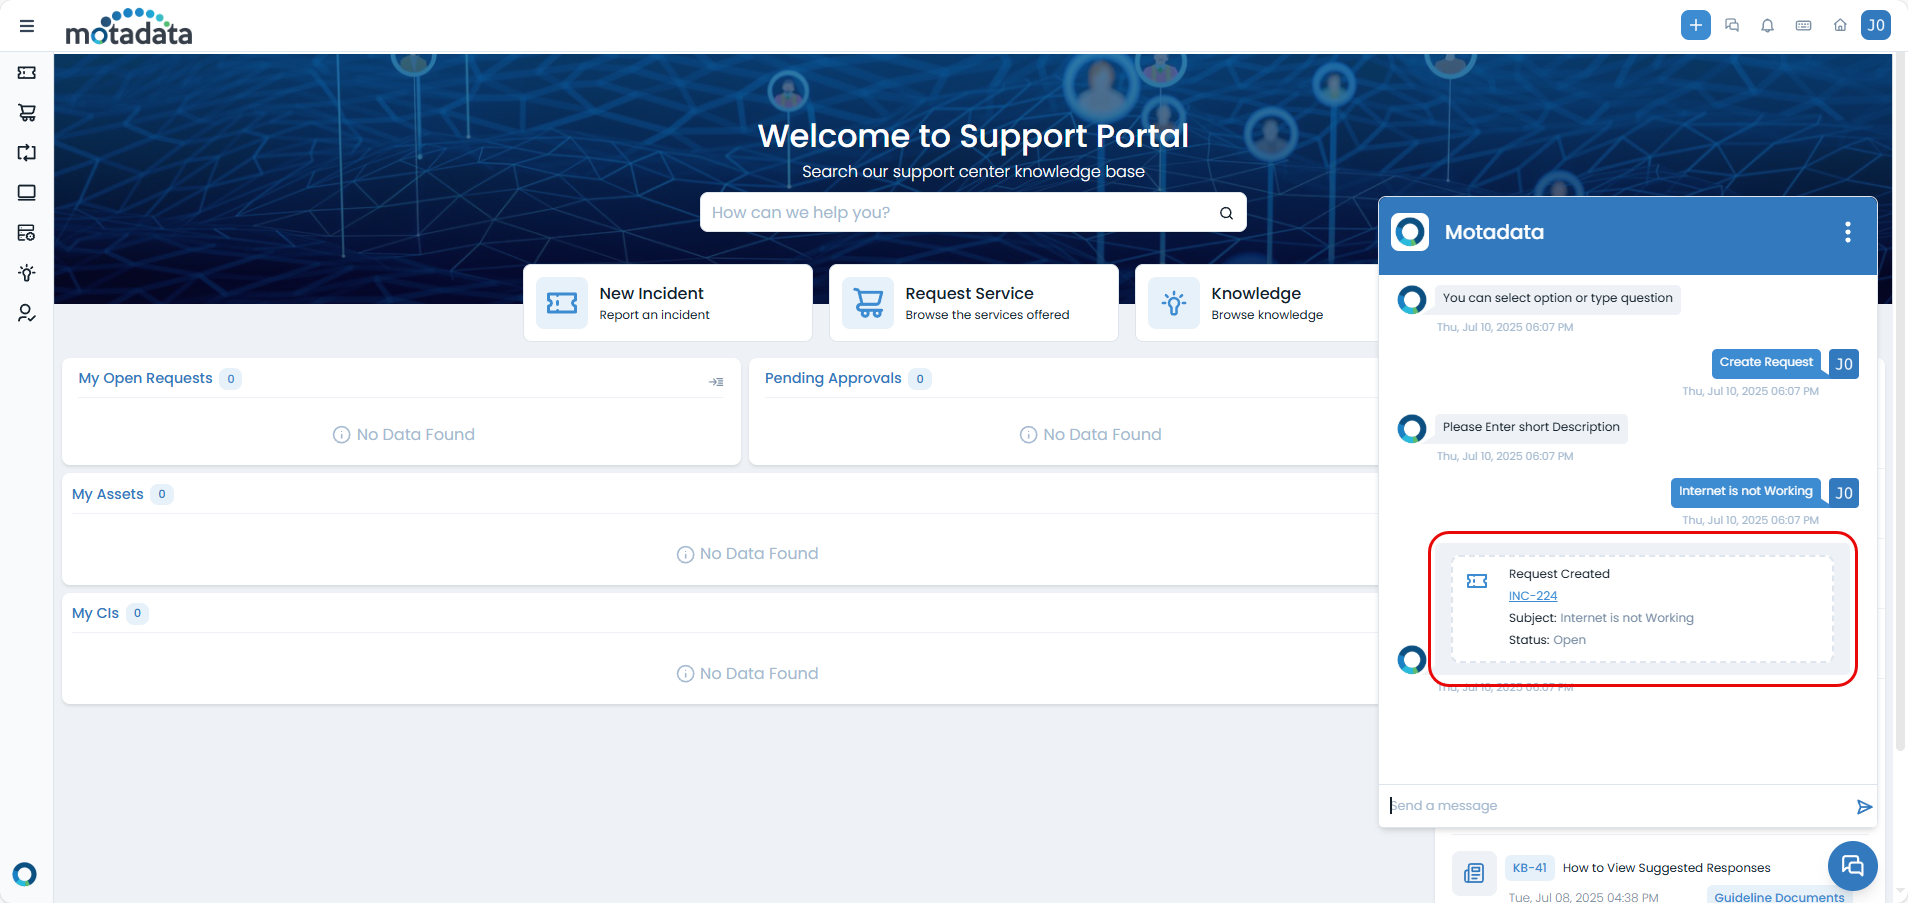
Creating Requests
You can create incidents and service requests directly from chat conversations:
- Automated Request Creation
- Manual Request Creation
Start a chat with the virtual agent
Describe your issue or service need
Follow the prompts to provide required information
Review and confirm the request details
Submit the request to create a ticket
Chat with a technician about your issue
Ask the technician to create a request for you
Provide necessary details during the conversation
Receive the request number once created
Once a request is created through chat, you can track its progress through the Support Portal's request management section.
Mobile Access
Chat support is also available through the mobile app:
Open the mobile app and navigate to the Support Portal
Tap the chat icon in the bottom-right corner

Start conversations with virtual agent or technicians
Share files from your mobile device
Mobile chat support provides the same functionality as the web version, allowing you to get help on the go.
Benefits
- Immediate Assistance
- Enhanced Communication
- Time Efficiency
- Accessibility
- Real-time responses for urgent issues
- No waiting in queues for basic questions
- Instant access to help when you need it
- File sharing for better issue documentation
- Screenshot sharing for visual problem description
- Document attachments for detailed information
- Faster resolution through direct communication
- Reduced back-and-forth with immediate responses
- Streamlined request creation process
- Available 24/7 through virtual agent
- Multiple platform access (web, mobile, messaging apps)
- Guest user access for basic assistance
Best Practices
- Before Starting Chat
- During Conversations
- After Resolution
Preparation
Gather relevant information about your issue
Prepare screenshots if applicable
Have your request details ready
Check if it's a common issue that might have a knowledge article
Communication Tips
Be clear and specific about your issue
Provide context about when the problem started
Share relevant files or screenshots
Ask follow-up questions if needed
Be patient if technicians are helping multiple users
Follow-up Actions
Confirm the solution works for you
Thank the technician for their help
Save important information from the conversation
Follow up if the issue persists
Troubleshooting
Common Problems and Solutions
| Problem | Solution |
|---|---|
| Chat Icon Not Visible | Contact your administrator to enable chat support |
| Cannot Send Messages | Check internet connection, refresh page, contact support |
| File Upload Fails | Check file size (under 5 MB for SaaS), ensure file type is allowed |
| Chat Console Not Available | This feature must be enabled by your administrator |