Windows File Server Installation
Provides centralized file storage for patch and package management on Windows environments, enabling efficient software distribution across your IT infrastructure.
This guide provides step-by-step instructions for installing the Windows File Server using the MSI installer.
1. Prerequisites
System and Software Requirements
System Requirements
Operating System: Windows Server 2016 or later (2019 recommended). Windows 10/11.
Hardware: Minimum 4GB RAM, 50GB available disk space.
Software: Microsoft .NET Framework 3.5 is required.
Network: Firewall ports 80 (HTTP) and 443 (HTTPS) must be open for communication with the main ServiceOps server.
Before installation, verify that .NET Framework 3.5 is enabled in "Turn Windows features on or off".
Office 365 Patch Deployment Prerequisites
Enable Delivery Optimization Mode 99
- Log in to the Windows File Server with administrative privileges.
- Press Win + R, type
gpedit.msc, and press Enter. - Navigate to Computer Configuration > Administrative Templates > Windows Components > Delivery Optimization.
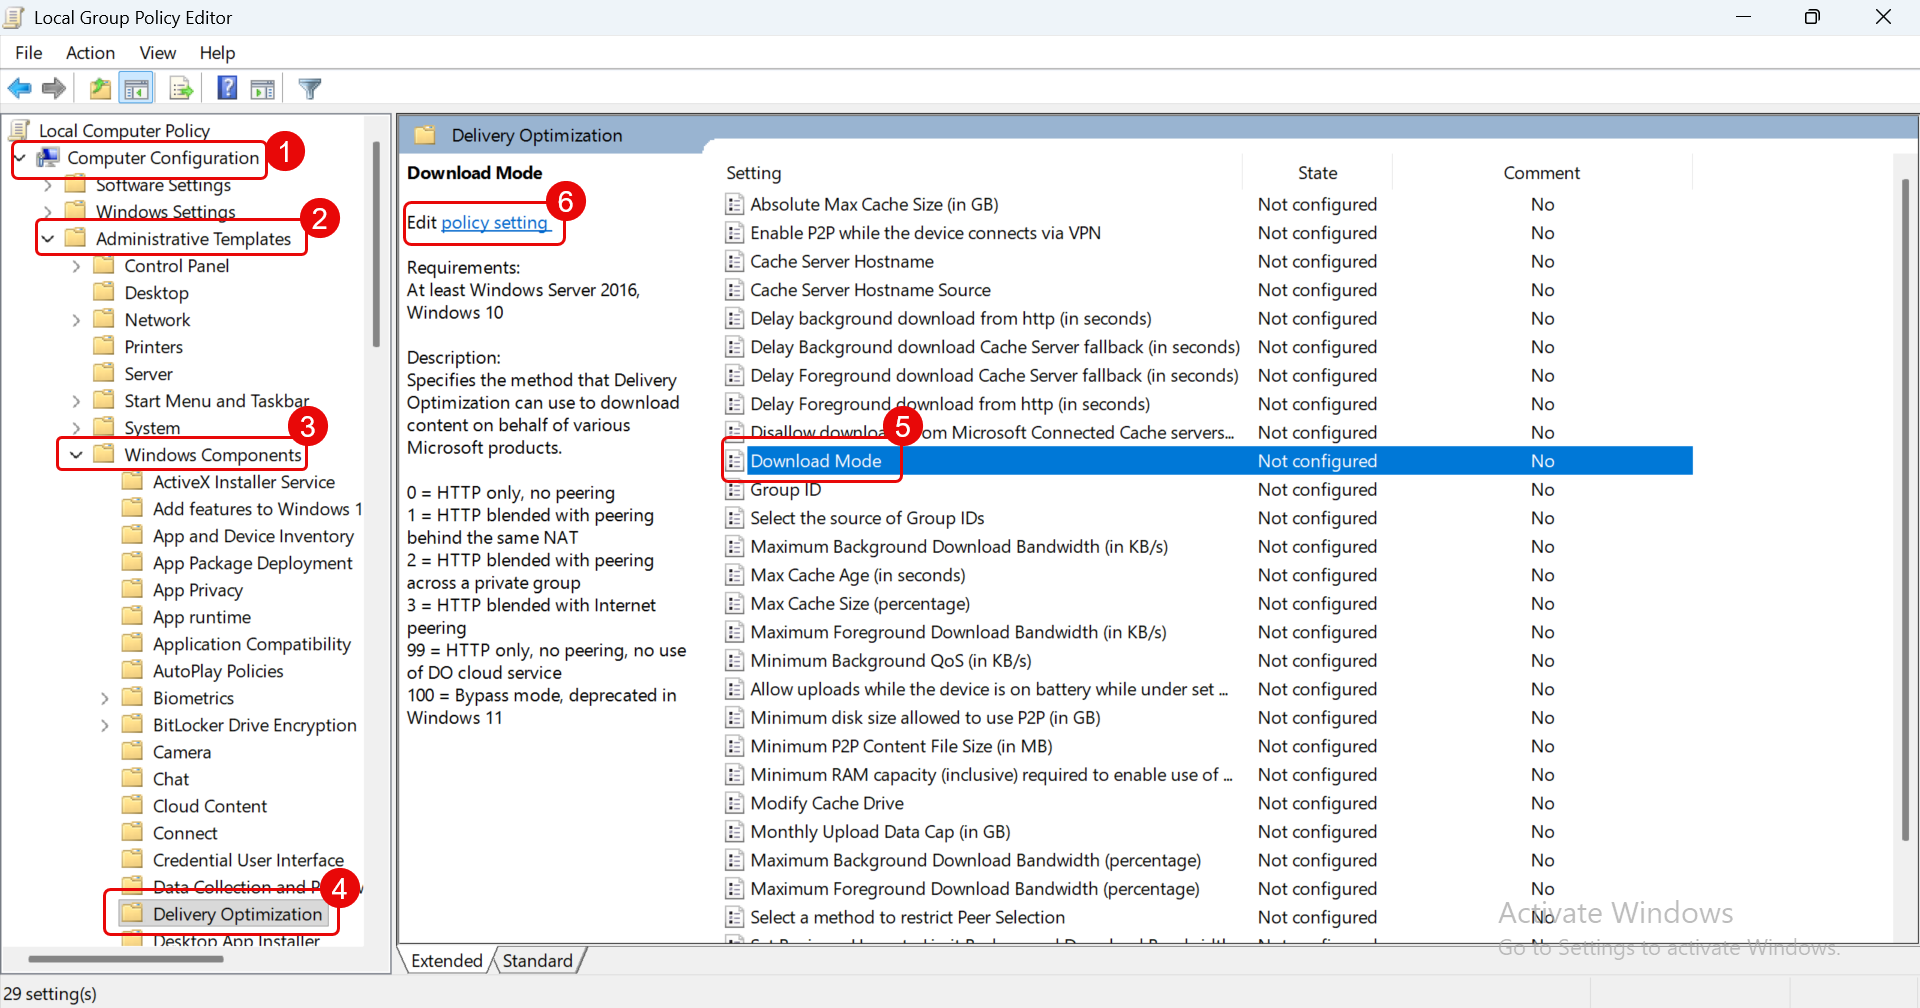
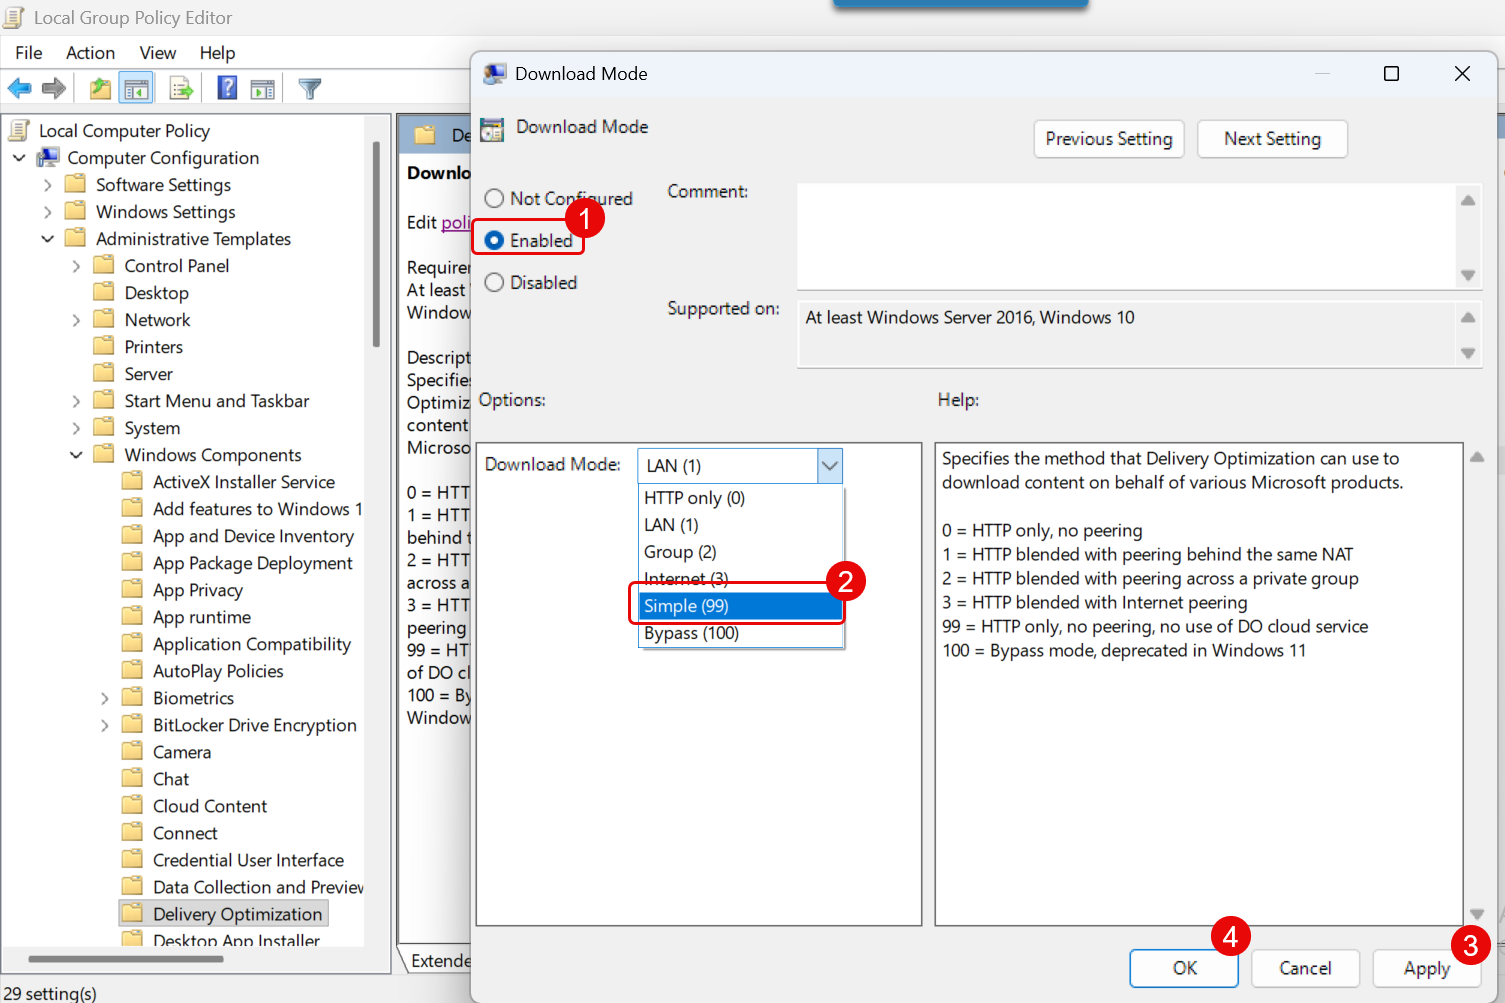
- Open the Download Mode policy.
- Select Enabled.
- Under Options, select Download Mode: Simple (99).
- Click Apply, then click OK.
- Open Command Prompt as Administrator and run:
gpupdate /force
- Verify the setting with:
reg query "HKLM\SOFTWARE\Policies\Microsoft\Windows\DeliveryOptimization" /v DODownloadMode
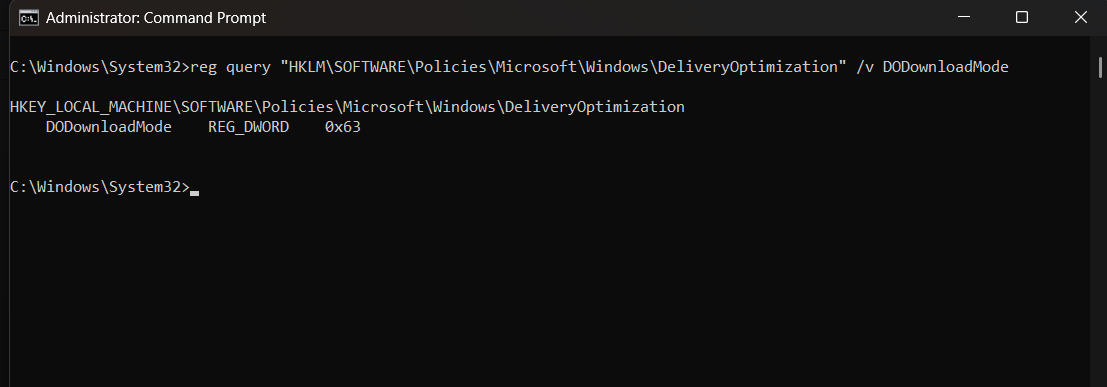
The expected value is 0x63 (hexadecimal), which equals 99 in decimal.
Whitelist Required Microsoft URLs
Allow the following domains through your firewall, proxy, or web filtering solution:
*.cdn.office.netf.c2r.ts.cdn.office.netofficecdn.microsoft.comofficecdn.microsoft.com.edgesuite.netconfig.office.comecs.office.comofficeclient.microsoft.commrodevicemgr.officeapps.live.comoneocsp.microsoft.comcheckappexec.microsoft.comctldl.windowsupdate.com*.delivery.mp.microsoft.comfe2cr.update.microsoft.comfe3cr.delivery.mp.microsoft.comdownload.windowsupdate.comcatalog.sf.dl.delivery.mp.microsoft.com
After enabling Delivery Optimization Mode 99 and whitelisting the above URLs, run a Group Policy update or reboot the server before starting any Office 365 patch synchronization or deployment. The Windows File Server must have outbound HTTPS connectivity to all Microsoft endpoints listed above.
2. Installation Process
Step 1: Download and Run Installer
Download: Get the
FSManager_v865.msifile from the Download Links page.Run as Administrator: Right-click the MSI file and select "Run as administrator". Click Next to begin.

Step 2: Configure File Server Type and Connection Details
The installation wizard requires you to define the File Server's role and connection parameters. It's crucial to select the correct type based on your deployment strategy, as this impacts patch distribution efficiency and network bandwidth usage.
Local File Server: Select the "Is local file server?" option when the File Server and the ServiceOps application are installed on the same machine. This server automatically acts as the Primary File Server, handling all patch downloads and direct distribution to managed endpoints. This option is recommended for:
- Single-office environments
- Lab or Proof-of-Concept (POC) setups
- Small-scale deployments with a limited number of endpoints

External File Server (Remote Installation): Leave the "Is local file server?" box unchecked if the File Server is on a separate machine or if you need to optimize patch distribution for remote offices. This external server can be configured as a Primary File Server or a Distribution/Relay Server. This setup is ideal for:
- Multi-office environments
- Large-scale deployments
- Scenarios requiring improved performance and optimized bandwidth usage

For remote installations, you must provide the ServiceOps server URL, protocol, port, storage path, and Secure Auth Code.
note- If the File Server is configured with HTTPS protocol, a valid CA-signed SSL certificate must be installed and configured on the application server.
- File server connectivity will not be established if self-signed, expired, or untrusted certificates are used.
- If a valid CA-signed certificate is not available, configure the File Server to use HTTP only.

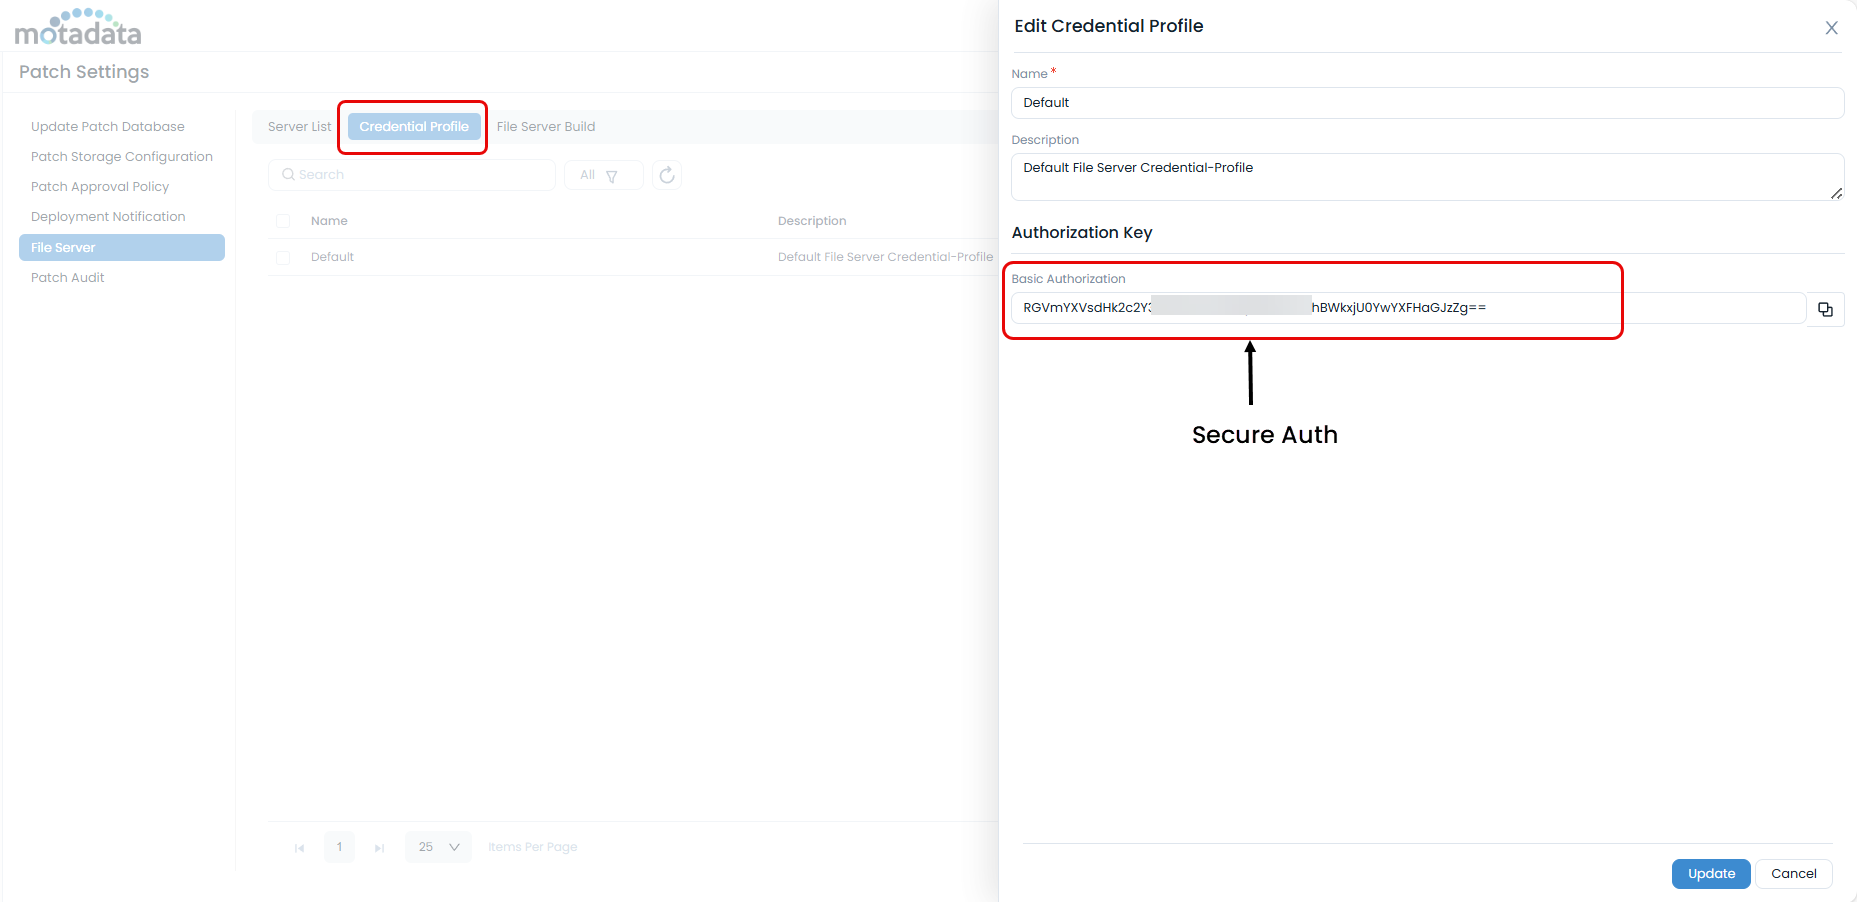
How to obtain the Secure Auth Code
Log in to ServiceOps as an administrator.
Navigate to Admin > Patch Management > Patch Settings.
Go to the Credential Profile tab.
Copy the code from an existing profile or create a new one.
Step 3: Complete Installation
Select Directory: Choose the installation folder.

Install: Review the settings and click Install.

Finish: Click Finish to close the wizard.

3. Primary File Server – Role and Importance
The Primary File Server acts as the central source of truth for all patch files within Motadata ServiceOps.
- Only the Primary File Server downloads patches directly from vendor repositories such as Microsoft, Linux distributions, and third-party application vendors.
- All patch content is stored on the Primary File Server before being distributed further.
- Other file servers receive patch files only from the Primary File Server and never directly from the Internet.
- At least one Primary File Server must be configured for patch management to function correctly.
4. Distribution Server – Role in Remote Offices
In a Remote Office setup, a separate File Server can be assigned as a Distribution Server for that location.
- The Distribution Server receives patch files from the Primary File Server.
- It does not download patches directly from the Internet.
- Endpoints in the remote office download patches locally from the Distribution Server, avoiding WAN-based downloads.
5. Patch Distribution Flow (End-to-End)
- Motadata ServiceOps identifies missing or required patches on managed endpoints.
- Patch binaries are downloaded from vendor repositories to the Primary File Server.
- The Primary File Server synchronizes patch files to Distribution Servers configured for remote offices.
- Endpoints download patches from either the Primary File Server or their assigned Distribution Server.
6. Example Deployment Scenario
Company Setup:
- Headquarters (HQ): Mumbai
- Remote Office: Bengaluru
| Location | Components Installed | File Server Role |
|---|---|---|
| HQ (Mumbai) | ServiceOps + File Server (Same machine) | Primary File Server |
| Bengaluru | File Server (Separate machine) | Distribution Server |
Patch Flow in this Example:
- A Windows security patch is released by Microsoft.
- ServiceOps downloads the patch to the Primary File Server at HQ.
- The patch is replicated from HQ to the Bengaluru Distribution Server.
- Endpoints in HQ download patches from the Primary File Server.
- Endpoints in Bengaluru download patches from the local Distribution Server.
7. Key Benefits
- Reduced Internet bandwidth usage
- Faster patch deployment in remote offices
- Centralized control with localized distribution
- Scalable design suitable for growing enterprise environments
8. Post-Installation and Operations
This section explains how to verify the File Server in Motadata ServiceOps, set its public URL (for remote access), and assign it to remote offices for efficient patch distribution. It also includes maintenance, troubleshooting, and upgrade/security best practices.
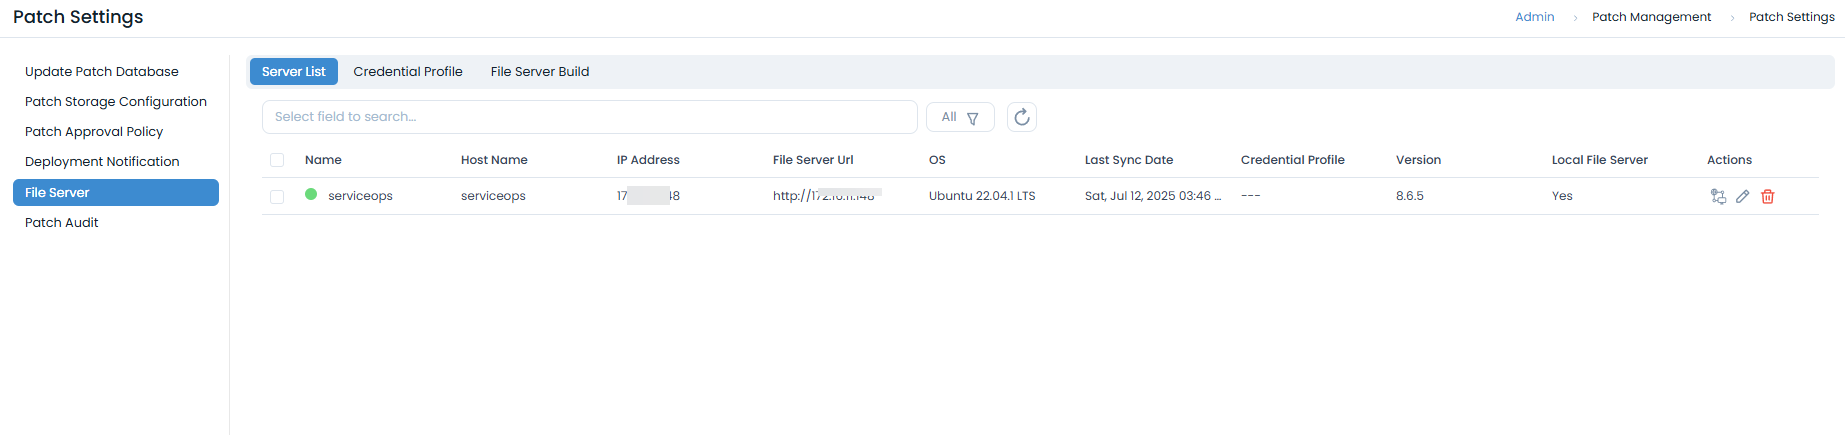
Verify and Configure in ServiceOps
Verify Registration: In the ServiceOps portal, navigate to Admin > Patch Management > Patch Settings > File Server to confirm your server appears in the list.
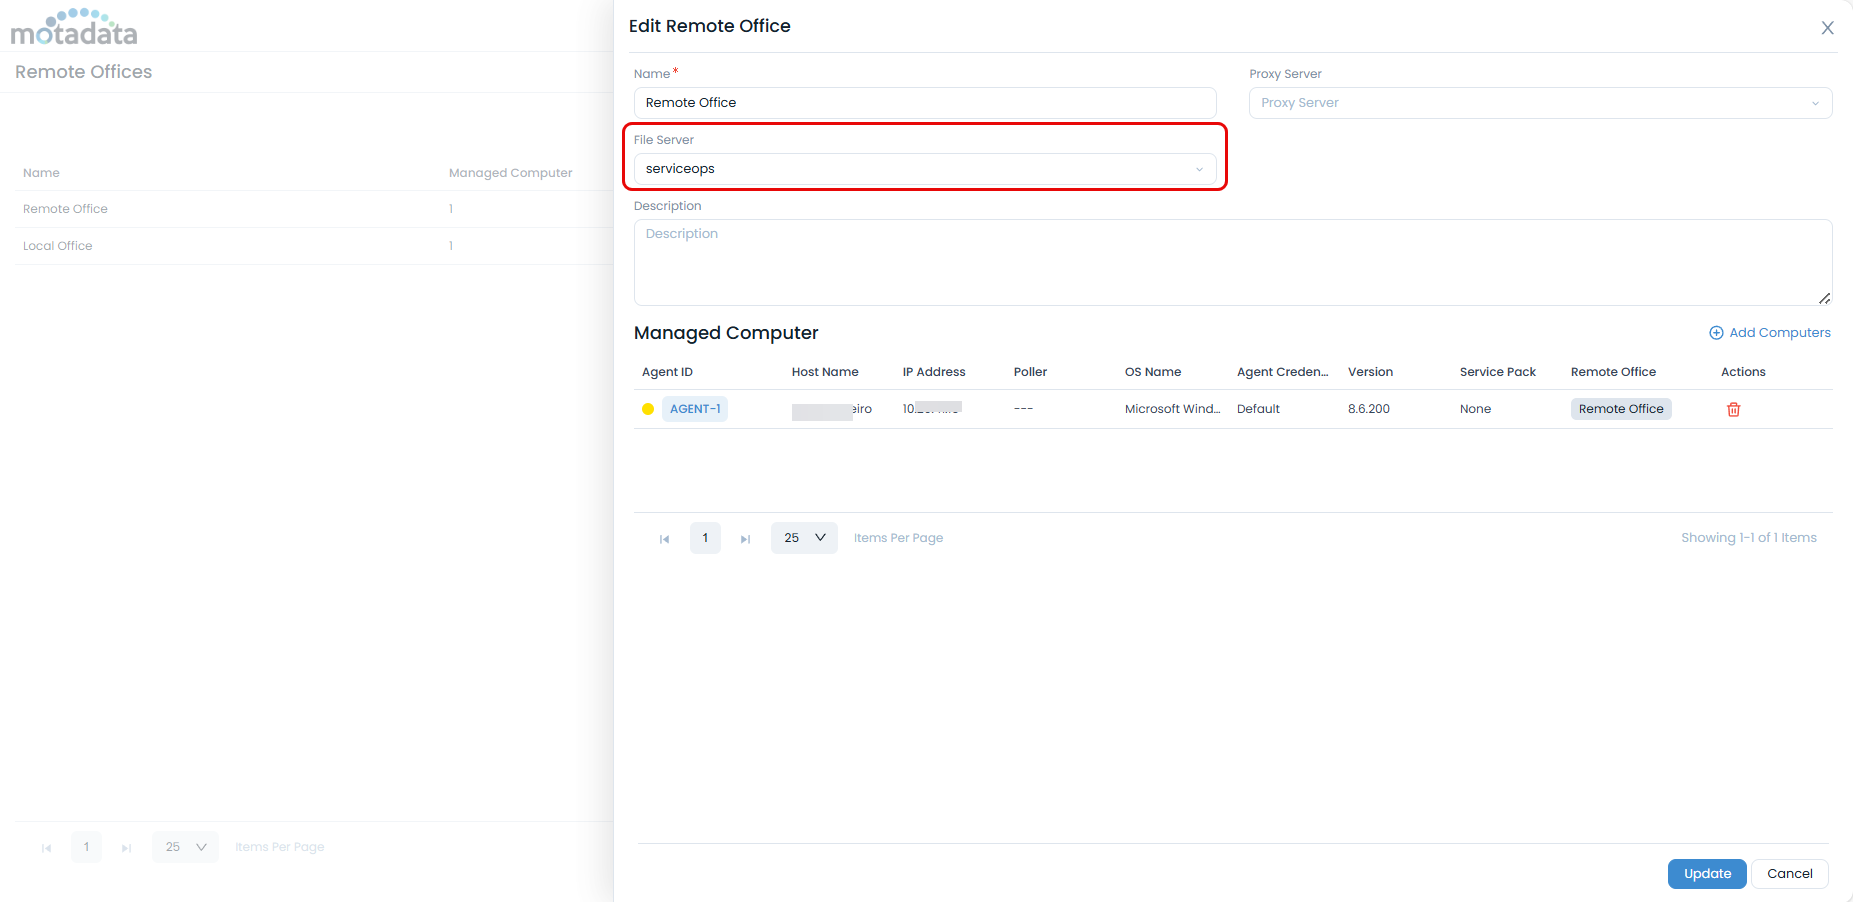
Configure URL (Remote Only): For remote installations, click Edit on the file server and update the File Server URL with its public-facing address (e.g.,
http://your-file-server-ip).Configure Remote Offices: If you have multiple locations, assign the file server to the appropriate remote office under the Remote Offices tab.
Maintenance and Troubleshooting
Service Management
The Motadata File Server runs as a Windows service.
You can manage it through the Services console (services.msc), net start/stop, or PowerShell's Start-Service/Stop-Service cmdlets.
Ensure its startup type is set to Automatic.
Troubleshooting
- .NET Framework Errors: Ensure .NET 3.5 is installed and enabled.
- Permission Errors: Run the installer as an administrator.
- Network Issues: Use
pingandtelnetto test connectivity to the main ServiceOps server. - Service Fails to Start: Check the Windows Event Logs (Application log) and File Server logs at
C:\Program Files\Motadata\FileServer\logs\.
Upgrade and Security
Upgrade Guidelines
- Backup your configuration.
- Stop the "Motadata File Server" service.
- Run the new MSI installer as an administrator.
- Verify the service and registration post-upgrade.
Security Best Practices
- Configure Windows Firewall to only allow traffic from trusted IP addresses on ports 80 and 443.
- Use SSL/TLS certificates for production environments.
- Keep the Windows Server updated and configure antivirus exclusions for the File Server directories.